Honda CB750 Sandcast

Restoration of Sandcast #97

markb · 814 · 333633

markb

  • Moderator
  • Hero Member
  • *****
    • Posts: 1249
    • View Profile
A longshot but I guess you consider everything at this moment.
You got that right.  I did pick up a new set of points today.  I had the set off the NOS assembly which was a different plate (so who knows if they're right even though they look identical) and tried a set of used points.  I'll give the new ones a try.  I wish I could do it before the weekend but it doesn't look that's going to happen.
Mark B
1969 CB750 sandcast #97 restored - Sold Restoration thread link
1969 CB750 sandcaxt #576 - Sold
1969 CB750 sandcast #1553 - Sold
1969 CB750 sandcast #1990 - Sold
1969 CB750 sandcast #5383 restored - Sold Restoration thread link
1970 CB750 K0 restored - Sold
2010 H-D Tri Glide Ultra Classic (Huh?)


markb

  • Moderator
  • Hero Member
  • *****
    • Posts: 1249
    • View Profile
I'm taking a little break from the points and timing.  The new oil pressure wire that I bought had a ring terminal instead of the old style spade terminal.  I wanted to change it and in the process I found an excellent resource for parts for repairing wire harnesses.  Check out this thread:
http://cb750sandcastonly.com/smf_forum/index.php?topic=1423.msg10039#msg10039

So I was able to change to the correct terminal and it looks great especially with the NOS oil pressure sensor.  I also used the correct pan head screw instead of the hex head.


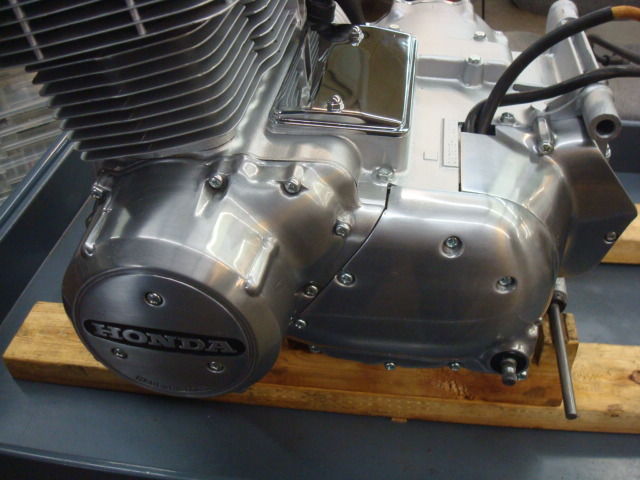
Now I can put the starter motor cover on.  I used the acorn head screws from Yamiya just for fun.

Mark B
1969 CB750 sandcast #97 restored - Sold Restoration thread link
1969 CB750 sandcaxt #576 - Sold
1969 CB750 sandcast #1553 - Sold
1969 CB750 sandcast #1990 - Sold
1969 CB750 sandcast #5383 restored - Sold Restoration thread link
1970 CB750 K0 restored - Sold
2010 H-D Tri Glide Ultra Classic (Huh?)


markb

  • Moderator
  • Hero Member
  • *****
    • Posts: 1249
    • View Profile
OK, back to the ignition.  I decided to check the run out on the spark advancer shaft one more time.  I wasn’t real happy with my indicator mount so I sawed out a ¼” steel plate to mount to the points cover holes.  Nice and rigid now.  Shaft indicated true so on to the next step.


I broke the rules when it comes to diagnosing a problem.  You should only change one thing at a time to see if there is a change.  But I went ahead and put in a different spark advancer and new points.  I also put a .003” shim on the O.D. of the plate at each of the three locating ridges to take out the play and center the plate.  I saw where some guys would jam it all one way but it made more sense to me to center it.  Since I had my indicator setup I found a slick way to set the points.  The picture is a little hard to see but I put the indicator on the pivoting half of the points.  Then I put a .015” thick feeler between the points and adjusted the points until I saw the needle move .001”.  Then as I snugged it down if I saw the needle move I would tweak the adjustment until I got the screw tight.  I pulled the feeler out and when I put it back in it deflected .001” so my gap is exactly .014”.  Other side same thing.  It was super easy.  Then I did the timing.  I was concerned about the springs being tight enough to keep the spark advancer from rotating but realized that as long as you only turn the crank clockwise the friction of the lubricating felt and the points followers will keep the spark advancer in the right position.  


As you can see the plates are rotated near the end of the slots as before but there is a good 1/16” before they would bottom out.  At least there is a little room.  And the points and timing are dead on.  Bottom line – I’m calling it good.  :) It still puzzles me a bit as to why it’s near the end of travel but I’m confidant it’s OK.  I probably shouldn’t have been concerned about it.  ::)

« Last Edit: February 02, 2015, 08:49:28 am by markb »
Mark B
1969 CB750 sandcast #97 restored - Sold Restoration thread link
1969 CB750 sandcaxt #576 - Sold
1969 CB750 sandcast #1553 - Sold
1969 CB750 sandcast #1990 - Sold
1969 CB750 sandcast #5383 restored - Sold Restoration thread link
1970 CB750 K0 restored - Sold
2010 H-D Tri Glide Ultra Classic (Huh?)


markb

  • Moderator
  • Hero Member
  • *****
    • Posts: 1249
    • View Profile
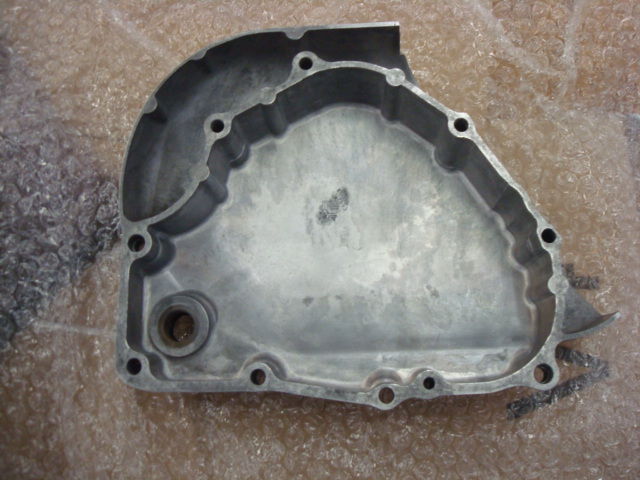
By the way, I had the rotor cover off and used the rotor bolt to turn the crank.  Then I didn’t have to worry about bending the spark advancer shaft.  So now I can put on the left side covers.  Here is the transmission cover on the inside.  This is the one that came off and should be correct.

Here is the sprocket cover.  I believe it to be correct too although it was missing when I got the bike.  If someone thinks otherwise please let me know.
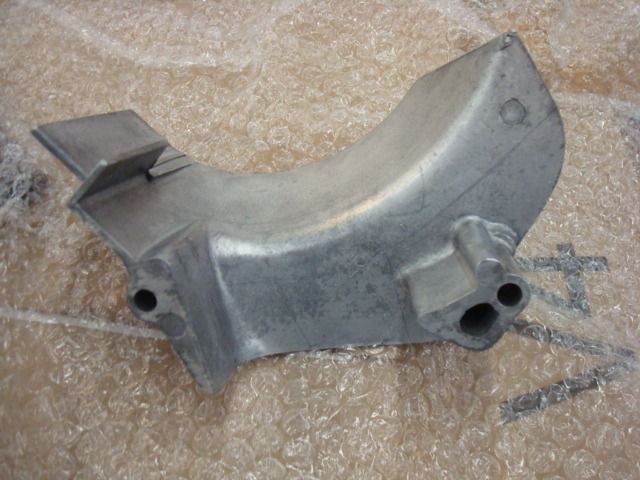

Now it’s looking like something got done.  But I have to say not without a struggle…again.  When I went to put the sprocket cover on it wouldn’t fit.  I had to sand about .020” off the mounting pads on the inside to get it to fit between the cases and the transmission cover.  Maybe it is not correct?  ???


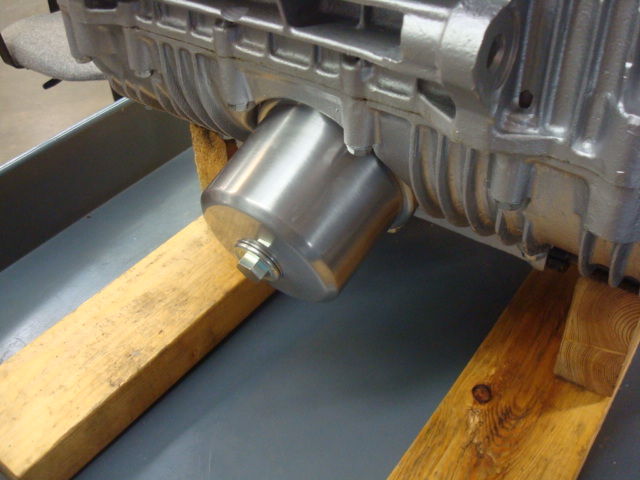
Just for fun I put the oil filter housing on just to see how it looked.  This is my fake one (saving the real one for good) but I like it.  ;)  I realize I’ll have to take it off anyway to put the engine in the frame.

I have the cam chain tensioner and except for the points cover and clutch adjustment cover, that’s about it on the engine.  I could really put the engine in any time now.  I need to assemble the rear brake shaft and the center stand then I just might do that.
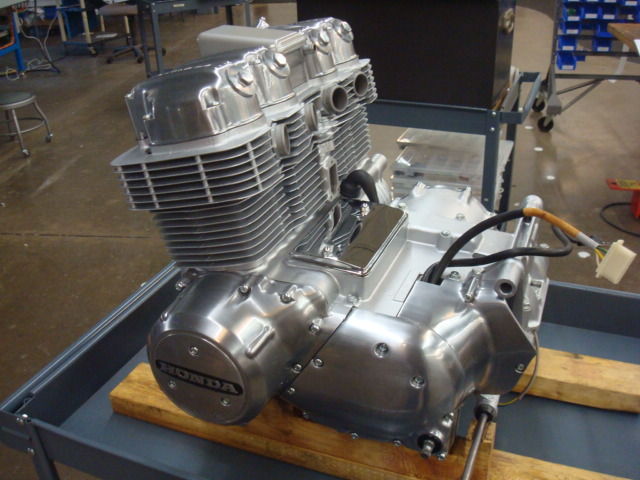

Actually I should do some other prep.  I had the 19 liter tank painted a long time ago and in fact I had two sets of red but I don’t have them anymore.  Of the two sets, I had one set painted gold for my K0 and the other set went with 5383.  So I need to get parts out for painting.  The other thing I need to do is get all my controls and master cylinders out for black anodizing.  I have a little cleaning and polishing to do first.  I don’t want to be waiting for that stuff when I’m ready for it.  After that it should go pretty good.  All of the black paint, zinc and chrome are done although I’m sure there will be something to hang me up.  ::)
Mark B
1969 CB750 sandcast #97 restored - Sold Restoration thread link
1969 CB750 sandcaxt #576 - Sold
1969 CB750 sandcast #1553 - Sold
1969 CB750 sandcast #1990 - Sold
1969 CB750 sandcast #5383 restored - Sold Restoration thread link
1970 CB750 K0 restored - Sold
2010 H-D Tri Glide Ultra Classic (Huh?)


4pots1969

  • Hero Member
  • *****
    • Posts: 760
    • View Profile
Content for you until ignition problems are almost solved..
Here is a first CORD ASSY, the endpoint is in grey for the first finish if this can help you in the restoration.


markb

  • Moderator
  • Hero Member
  • *****
    • Posts: 1249
    • View Profile
Thanks Gerard.  That looks like it would be easy to reproduce.
Mark B
1969 CB750 sandcast #97 restored - Sold Restoration thread link
1969 CB750 sandcaxt #576 - Sold
1969 CB750 sandcast #1553 - Sold
1969 CB750 sandcast #1990 - Sold
1969 CB750 sandcast #5383 restored - Sold Restoration thread link
1970 CB750 K0 restored - Sold
2010 H-D Tri Glide Ultra Classic (Huh?)


kp

  • Administrator
  • Hero Member
  • *****
    • Posts: 1808
    • View Profile

markb

  • Moderator
  • Hero Member
  • *****
    • Posts: 1249
    • View Profile
Thanks KP.  I have already decided I'm going to make a correct wire.  :)
Mark B
1969 CB750 sandcast #97 restored - Sold Restoration thread link
1969 CB750 sandcaxt #576 - Sold
1969 CB750 sandcast #1553 - Sold
1969 CB750 sandcast #1990 - Sold
1969 CB750 sandcast #5383 restored - Sold Restoration thread link
1970 CB750 K0 restored - Sold
2010 H-D Tri Glide Ultra Classic (Huh?)


Marcello Tha

  • Full Member
  • ***
    • Posts: 189
    • View Profile
The transmission cover and sprocket cover are 100% correct.


markb

  • Moderator
  • Hero Member
  • *****
    • Posts: 1249
    • View Profile
Thanks Marcello.

I’m looking ahead at some of the frame stuff.  I got the tins sent out for painting (except for the tank which is done).  Fortunately I had a headlight bucket painted by the same guy that matches the tank.  I sent it along.  I’m also working on getting my handlebar controls ready for black anodizing.

In the meantime I’ve been looking at options for the wire harness.  As most of you probably know the correct harness would be the NLA 32100-300-040 and decent used ones are very rare.  I had been thinking I would make a facsimile from a -050 by removing the extra wires and replacing the part number tag.  I have a couple of new -050’s but they do look quite a bit different from the -040’s and I have a couple used -050’s but they are in pretty rough shape.  I also have two -040’s: one not so good but the other one is in really good condition considering its age.  Even the sleeve to the headlight bucket is flexible and not cracked.


So now I’m leaning towards using this harness.  Here’s a close up of the tag.  I wonder if I just used a little soap and water if it would clean up without taking off the printing.  The rest of it should clean up nicely except for the insulators.


That’s my hesitation to use it is because most of the insulators are yellowed, some worse than others.  Any tricks for removing the yellowing?  I seem to recall someone using an ultrasonic cleaner for wiring harnesses.  I’m not sure I would put the whole harness in it but it shouldn’t hurt the terminals.  I just don’t know if it would remove the yellowing.


I bought some terminals and insulators thinking I might replace some of them but it looks like some of the insulators are heat sealed on the wire.  I’m not sure how I would duplicate that.  Like I said, I’m thinking of using this harness thinking that a decent correct one will be better then a new fake one.

Mark B
1969 CB750 sandcast #97 restored - Sold Restoration thread link
1969 CB750 sandcaxt #576 - Sold
1969 CB750 sandcast #1553 - Sold
1969 CB750 sandcast #1990 - Sold
1969 CB750 sandcast #5383 restored - Sold Restoration thread link
1970 CB750 K0 restored - Sold
2010 H-D Tri Glide Ultra Classic (Huh?)


Steve Swan

  • Hero Member
  • *****
    • Posts: 2705
    • View Profile
    • cb750sandcastonly.com
A few years back, if i remember correctly, Conrad, i believe, "wld41", posted pics of crusty harness he put in ultrasonic.  the positive results were quite surprising.  might be worth a try....


Wayne

  • Administrator
  • Hero Member
  • *****
    • Posts: 1044
    • View Profile
Mark I remember a post where a member replaced the insulators on his harness. He sealed them to the harness by using one of his wife's or daughters old hair flat irons I believe it was. Through trial and error he carved the shape he needed into the flat iron heating pads to make the correct looking crimp. (Melt) I'll keep looking for the post.
[size=


Wayne

  • Administrator
  • Hero Member
  • *****
    • Posts: 1044
    • View Profile
It was ashimotok0 and he did make it from his daughters hair iron.
[size=


markb

  • Moderator
  • Hero Member
  • *****
    • Posts: 1249
    • View Profile
Steve, yes now I remember, it was Conrad.
Wayne, that sounds feasible.  I'll track it down.  I should be able to machine something up.
More to think about  ::)
You guys are the best.  Thanks for the feedback!  ;)
Mark B
1969 CB750 sandcast #97 restored - Sold Restoration thread link
1969 CB750 sandcaxt #576 - Sold
1969 CB750 sandcast #1553 - Sold
1969 CB750 sandcast #1990 - Sold
1969 CB750 sandcast #5383 restored - Sold Restoration thread link
1970 CB750 K0 restored - Sold
2010 H-D Tri Glide Ultra Classic (Huh?)


ashimotok0

  • Sr. Member
  • ****
    • Posts: 323
    • View Profile
Yes it was me and I did make the fusing tool from a pair of my daughter's old hair straighteners. The problem was finding the unplasticized plastic clear sleeve. I did find some at a works Chrismas party used for inflating those squeeky ballon thingy's. I went round after the meal collecting everyones unused ones. They are probably unplasticised for safety reasons.

I need to revisit this because I fell ill after that original  post and chickened out and used the Vintage Connections sleeves (see attached) but you have rekindled my enthusiasm Mark for my CB350K1 / Cb250K0 wiring loom restorations.

I also used the tinning solution for re-tinning the old connectors and plating the bare brass ones from VC, the type of solution you use for making prototype printed circuit boards (PCB's).

Attached  is my harness from my 750 etc that I refurbished using the above materials, way back . I even managed to replace/ resolder an individual diode in the rectifier pack. This was from a '69 UK bike that had seen the ravages of many of our grimy winters and was in a shocking state, to start with. All of the parts were re-plated at home.

Mark , I am in default as I need to send you various sizes of the woven glass/ silicone impregnated sleeving for points / alternator sub-harness etc but I have misplaced a large reel of the alternator stuff. I need to order some today anyway for my job. can anyone confirm the ID is 10mm please?

Ash
« Last Edit: February 17, 2015, 06:03:47 am by ashimotok0 »