OK, so after my summer hiatus, Iím officially back to it.
Iíve spent the last week or more getting things organized and trying to figure out what to do for the alternator cover. As earlier posts show, it has a crack and some gouges in it. One way or the other, it has to have some welding done to it. I decided to experiment with an old valve cover that came off an 11/69 build engine (probably about as close to being the same material as could be). I had a welder make some welding rods out of the cover and use it to patch a hole that he had drilled into the cover. It actually turned out pretty good as far as blending in but even with the small diameter rods (1/16Ē or 1.5 mm) Iím still concerned about getting weld into the lettered area on the cover plus I would have to do a test area on the alternator cover to be sure it would color match.
After a dozen or so phone calls and visiting several shops I came up with some other options. Two places suggested I just weld the whole lower half over and redo the lettering. After taking a picture and digitizing it, one guy would make an electrode with the lettering on it and EDM it and the other guy would engrave it. Both said it would be identical. OK, so in case I really botch it up I have a backup plan to fix it.
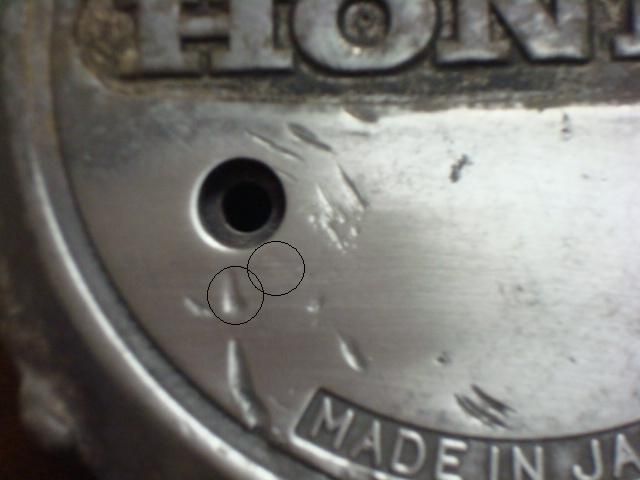
So I also found a guy that does micro welding and mold repair. For those not familiar with it, you actually look at the work through a microscope and a laser does the welding with a very small diameter wire. The welder didnít think the color would match but he did a small test weld and I think itís pretty close. I tried taking a pic that shows it but this crappy one is the best I could get. The left black circle shows a typical gouge and the right circle shows the area where there was a gouge a little smaller than the one thatís circled. If I hold it just right I can see it from about 6Ē (15 cm) away but on the bike from a foot (30 cm) away I donít think youíre going to see it. You can kind of make it out. I go for the original brushed look instead of polished and I think that will make it harder to see too.

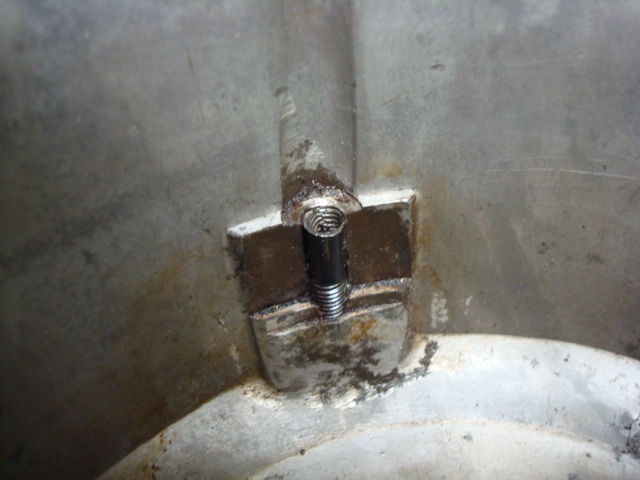
I think this is the method Iím going to use. A real plus is there is virtually no heat. I touched it immediately after he was done welding and it was cold. I would have left it with him but Iíve got some screws that I want to remove first in case he has to do more repair. I donít think I mentioned this in the spring but I had to drill screw heads off to remove the coil. I didnít want to, but believe me, I tried everything. I tried tapping it and using a left-handed screw (better than an Ezy Out I thought, I don't like them) to get them out but they still wouldn't budge.

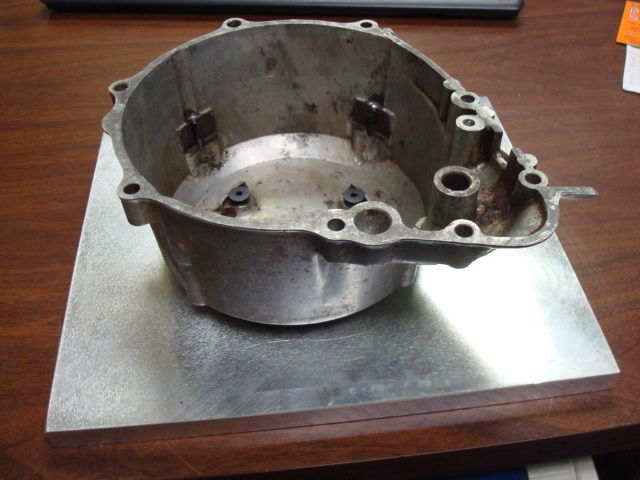
So I mounted the cover on a plate to make it easier to remove the screws. Iím dropping it off today. The guy is going to first trying putting a hex hole in the end of the screw with EDM and removing them with an allen wrench. If that doesnít work heíll EDM the screws out. I should get it back by the end of the week.

After that Iím going to clean it up and try to sand out some of the gouges that arenít too deep and then drop it off for micro welding.
« Last Edit: October 24, 2011, 03:25:34 pm by markb »
Mark B1969 CB750 sandcast #97 restored - Sold
Restoration thread link1969 CB750 sandcaxt #576 - Sold
1969 CB750 sandcast #1553 - Sold
1969 CB750 sandcast #1990 - Sold
1969 CB750 sandcast #5383 restored - Sold
Restoration thread link1970 CB750 K0 restored - Sold
2010 H-D Tri Glide Ultra Classic (Huh?)