Honda CB750 Sandcast

Here we go! Restoring 576/748

Wayne · 180 · 58696

Wayne

  • Administrator
  • Hero Member
  • *****
    • Posts: 1044
    • View Profile
Well, time is drawing near where I will tear down 576/748 and begin my restoration project. I want to get the frame completed before fall so I thought I would start some documentation and photos before I take it apart and post them here. Any suggestions or input as I go would be much appreciated!

My objective is to restore this bike to the best of my ability while keeping the bike as original as possible, where possible. That in itself will be a challenge given parts that have been changed on the bike as a result of recalls, service, wear and tear and just plain old deterioration.

Having said that I have not worked in over 8 years and I haven't found money growing on trees in Canada yet. In order to finish this project I may have to go with non "correct" or a combination of "correct" and non "correct" parts to complete the project. My thinking is, with a good foundation I can always finish the bike and add desireable stuff like recessed ignition switches etc. at a later time. Perhaps I'll have to give up some of my rare parts (if I have any) to get money to help with the build. Time will tell.

This sandy is somewhat special to me as I used to ride it in my younger years back in the early eighty's. I worked with a friend at a Texaco station back then and we always had a few bikes around. Mine being British I think I did more pushing than riding! My friend was always generous enough to let me ride the old Honda. After reading about these "sandcast" CB750's on the SOOC Website I called him up. To make a long story short he still had the bike! We struck a deal and here I am. The bike only has about 1500 miles more than the last time I rode it in 1982! I'm hoping I can unveil his restored CB750 to him sometime in summer 2011.
« Last Edit: November 05, 2010, 05:25:09 pm by Wayne »
[size=


Wayne

  • Administrator
  • Hero Member
  • *****
    • Posts: 1044
    • View Profile
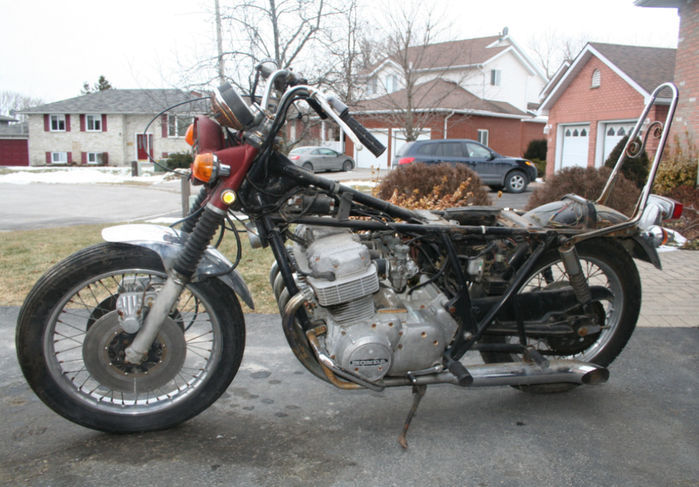
Here are pics of 576/748 as it arrived at my door. I had removed the gas tank and other items so as not to damage them in transit. Looks like the major items I am going to need are the front fender, seat and exhaust system. (regretably I can't commit to the LR exhaust at this time :( )


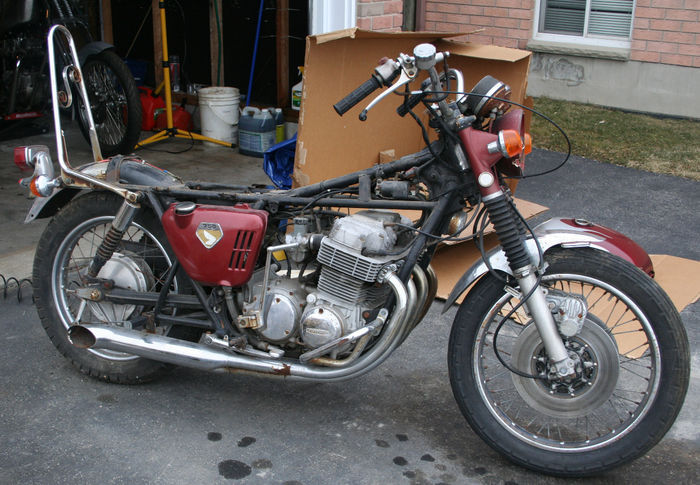
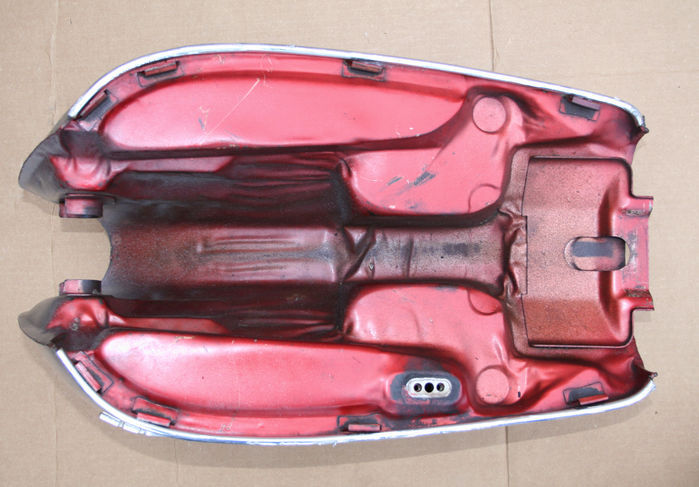
This is how the old girl looked when I got it home. The tank and covers were removed to avoid any damage.


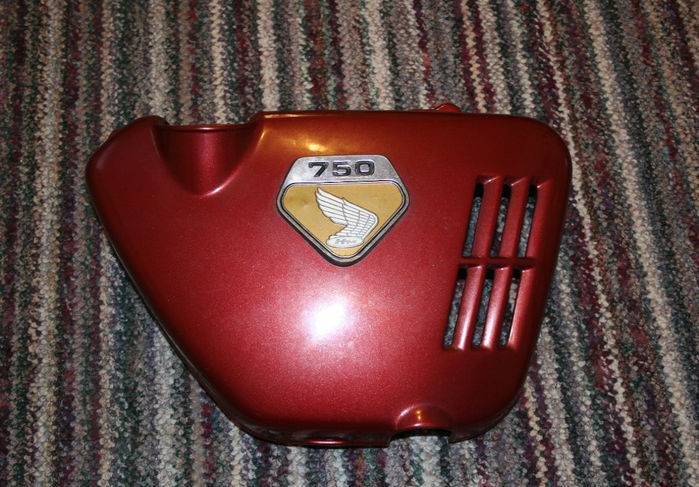
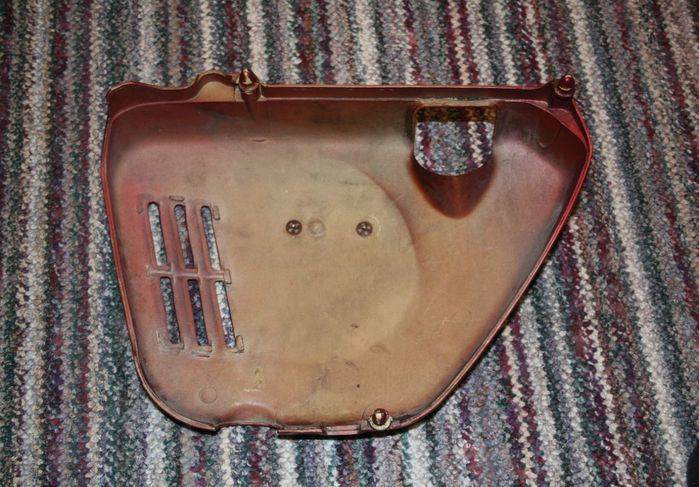
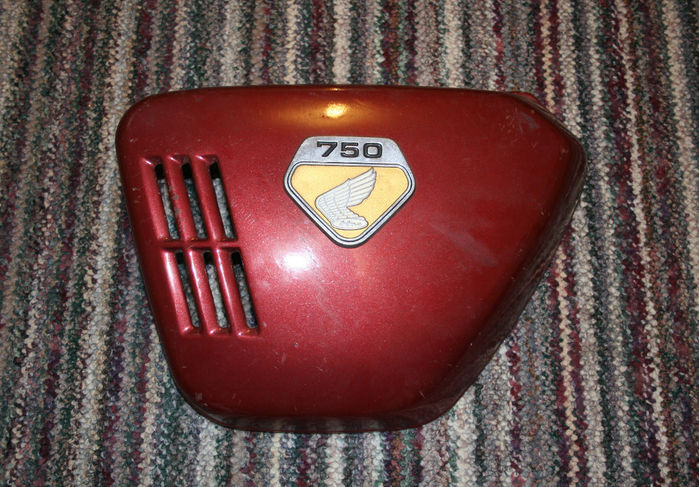
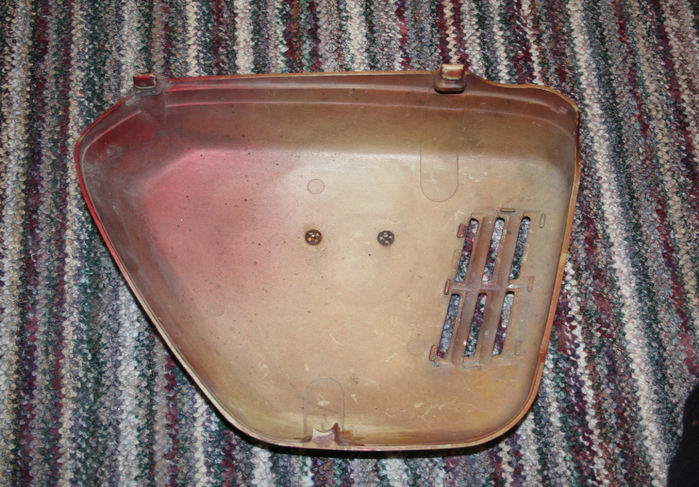
Overall the sidecovers are in pretty decent shape. Only the lower tab is broken on the right, no cracks that I can see on either however the mounting tabs for the screens will have to be repaired and new screens installed.


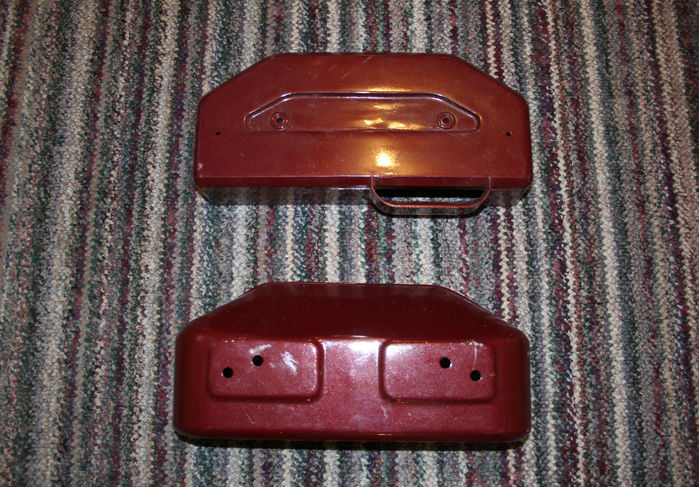
Wow! We have a rare early 2 hole air box without reliefs. I consider myself fortunate on this one. (This may be one of those items I could sell if I had to  :( ) Looks were a bit deceiving though and when I stripped the upper half there were many horrors to behold. Glue, bodyfiller, fiberglass resin. You name it! I have undertaken fixing it up in my spare time while waiting to make room in my garage for the sandy. I'll post the repair outcome later on.


The fuel tank is in amazing shape! No sealer for this piece. It's like new inside! Gotta love the old flamed paint job!


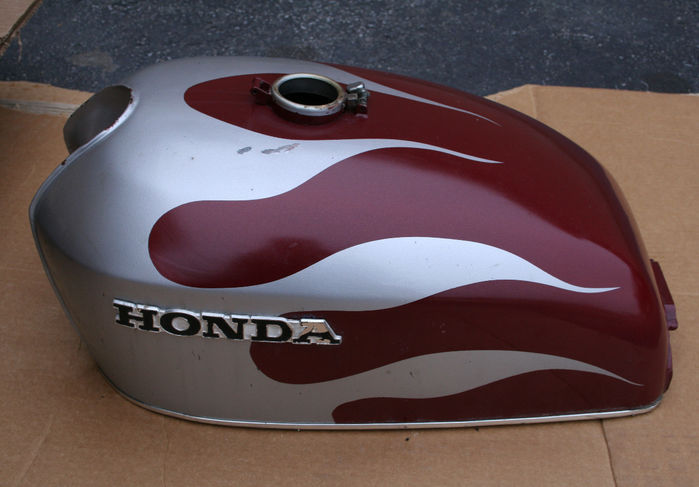
Note how the bottom only has the original Candy coat? There's no silver base and no clearcoat. 
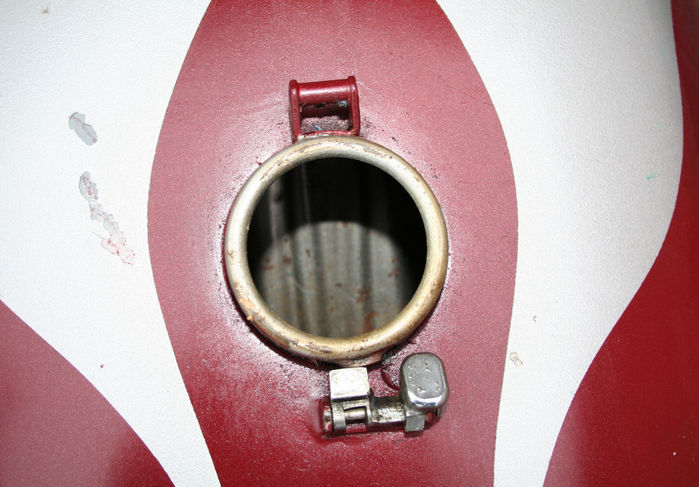
Note: There is no paint where the petcock mounts. I can't imagine Honda masking off the petcock prior to painting the tank. Anyone  ??? ??? ???


A look down the fill spout shows a nice clean tank inside!


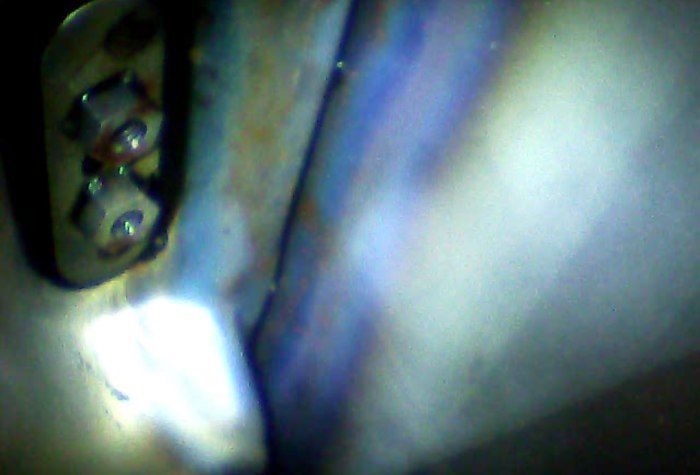
I dropped a webcam down inside for a little look. I cannot believe just how clean this tank is inside! Hard to believe it was bone dry empty sitting in a damp shed with only a tattered old tarp over it when I found her!


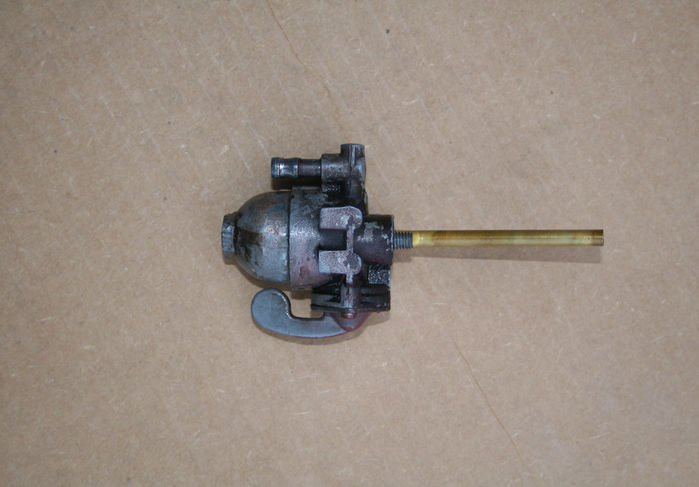
Alas a "short" Fuel Petcock. (Petrol to you folks across the pond  ;) ) Again a rare piece it seems. Will it make sense for me to keep it being that I don't have a 19 L tank to go with it?


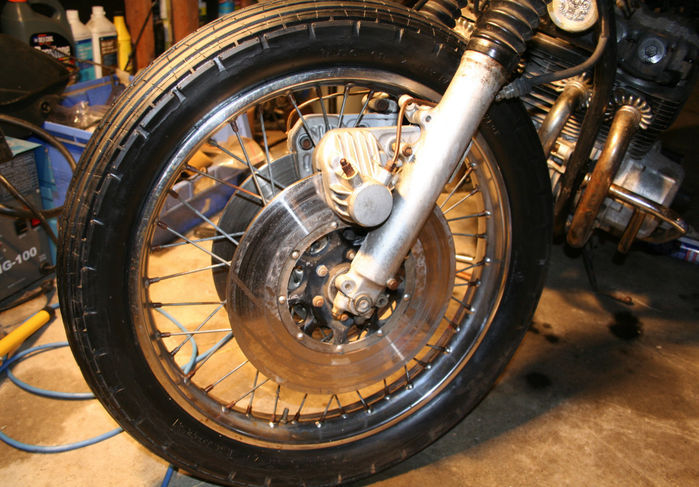
Rear wheel is the rolled rear rim and is in nice shape!


Front is original with a dealer added dual disk brake. Should I restore and install the second unit.  ???


The engine has good compression (can't remember the numbers now) with all cylinders within 5%. There is only 29 K documented miles on this bike. A bent fin on the head but other than that nothing too serious. There is no damage whatsoever to the cases from the chain

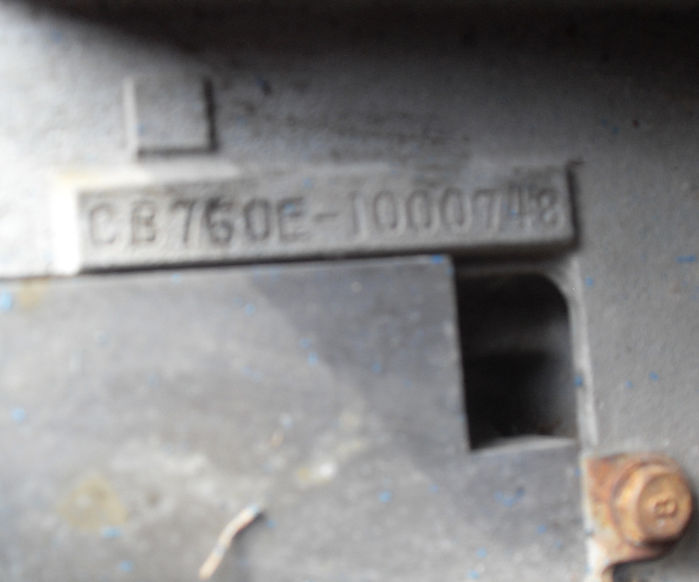
Nice "sandy" cases - number "748". I'm a lucky guy!


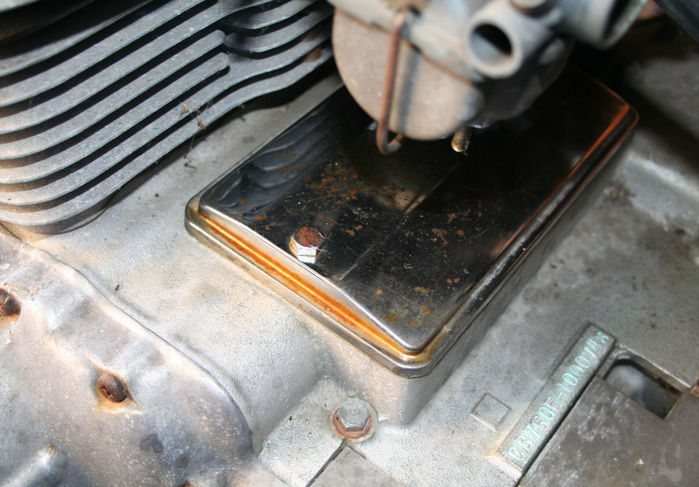
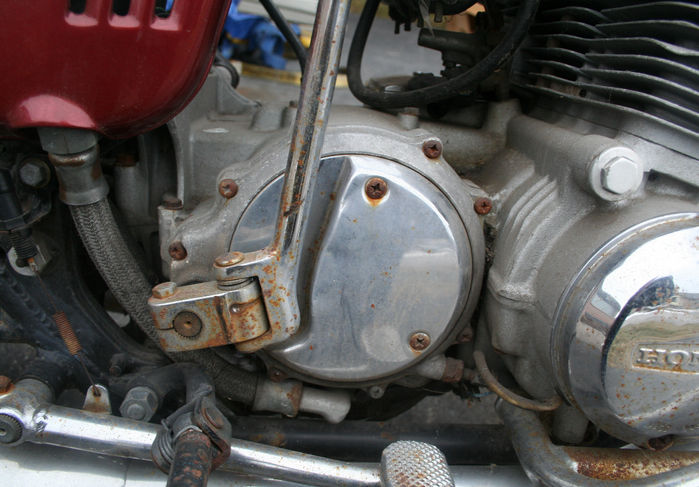
Showing the starter cover. Apparantly the fastener type has been of interest to a couple of members.


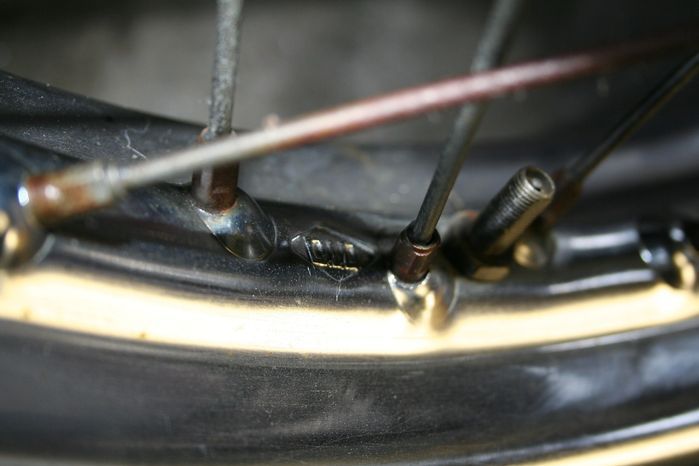
More engine details. Early Middle Type Oil Line??? - Webbed Fabric, smooth ferrule. Are mine just faded out to a silver colour?


The gauges are BAD and will require an overhaul top to bottom.

Frame is in great shape and I hope to be stripping it down and blasting it soon for paint! Finally!

So, the plan is to start disassembly as soon as I get my Harley into storage. (Early Nov. ???) I'll take more pictures as I go. If you want anything specific (number shots, certain fasteners or whatever) just ask.

Please do throw any advice you feel necessary my way. I have a lot to learn aboutthis old girl! Thanks.

« Last Edit: November 18, 2010, 03:52:14 pm by Wayne »
[size=


Wayne

  • Administrator
  • Hero Member
  • *****
    • Posts: 1044
    • View Profile
Just throwing together a list of some of the items I know I'm going to need. I'm sure this list will grow. I'll strike them off as I find (buy) them.

Front Fender
Seat
Exhaust (any hardware necessary to mount - my original is gone)
#8 Bolts for Exhaust Flanges
Center Stand (Found a beauty!)
Reproduction Air Box
Tires
Headlamp Pot
Headlamp - Hardware (I have nothing)
1 - Early Plain Blinker Lens (1 has a gouge in it) Have 3 perfect units.
New Side Cover Badges
Bolt and Spacer for Ignition Switch Bracket
Brake Hoses
Rear Shocks
Rear Winker Stays
2 - Battery Box Mount "8" Bolts
Oil Feed Line - Early Middle Type - Webbed Fabric - Smooth Ferrule
« Last Edit: November 30, 2010, 09:15:41 am by Wayne »
[size=


kp

  • Administrator
  • Hero Member
  • *****
    • Posts: 1801
    • View Profile
Hi Wayne,
Well done on what you're doing with your bike. I'll follow your restoration as I will with Marks. Couple of things I could offer. Your VIN, although I'm not 100% sure, didn't come with a 19 litre tank. I'm still trying to piece together the details on these tanks buy asking members to respond So far so good but nothing with a 19 litre as high as your VIN has been identified to me. In relation to the petcock, these were used well into the teen VIN numbers as there are three different versions of the wrinkle tank. The 19 litre, the first series 17 litre that used the early petcock (your tank fits into this group) and the 3re series 17 litre. Study the thread on the 86 differences between sandcasts and this should get you some of the necessary info needed. Noted as 14 and 15
14. short neck fuel tap, 1-1937 (long neck, 1938-onward)
15. 19 litre fuel tank, 1-325)

That airbox is interesting in that we have a VIN number which indicates that the no-relief 2 hole airbox was used up to your VIN.
I'll also have a look through my collection of lenses as I may have a good early one I can let you have. Don't hold your breath though.
Anyway keep up the good work as your VIN is an early one which when completed will be a treasure. KP
PS Petrol is correct terminology, Gas is something my wife has  ;D
« Last Edit: November 05, 2010, 08:52:20 pm by kp »
Yabba Dabba KP


Steve Swan

  • Hero Member
  • *****
    • Posts: 2705
    • View Profile
    • cb750sandcastonly.com
Thanks, KP for the great observations.  The 87 distinctions thread is observations collected from fellow members and is always worth studying, i can't remember even half of what is on the list.

Wayne, Sudco sells perfect reproduction sidecover badges for a little over $100 a pair.  If you want me to get you a set, let me know.

The 8mm bolts for the exh.clamps should be able to be sourced out of Japan, pretty sure KP would know the supplier.

The spokes and nipples, i use orignal, after having them new zinc plated.

I would not sell any parts off your bike, as far as the correct original parts on your bike appears unmolested.

I use a thin rubberized aerosol spray coating on the brake lines, it makes them black again.  The brake line i see, is correct.  Webbed fabric smooth ferrule.


Wayne

  • Administrator
  • Hero Member
  • *****
    • Posts: 1044
    • View Profile
Thanks KP. Perhaps you could give the wife a little Gasex.  ;)

Funny, I even remember how that signal lens got gouged. We used to park all of the bikes out front of the Texaco Station while we were using the bays. They would all come in each night. One morning a young gas jockey we had working for us was waiting at the station before we opened. He had some concerned look on his face. Apparently while pushing the bikes in he dropped the Honda! We checked the bike over finding only the gouged lens. Of course we gave him the gears for a while after that. The station sure was clean for a long long time though!  ;)

3 clear shiny Plain Blinker Lenses, 1 gouged.  :(


[size=


markb

  • Moderator
  • Hero Member
  • *****
    • Posts: 1249
    • View Profile
Nice tip on the Sudco emblems.  Yamiya has them for about $204 a pair.
Mark
Mark B
1969 CB750 sandcast #97 restored - Sold Restoration thread link
1969 CB750 sandcaxt #576 - Sold
1969 CB750 sandcast #1553 - Sold
1969 CB750 sandcast #1990 - Sold
1969 CB750 sandcast #5383 restored - Sold Restoration thread link
1970 CB750 K0 restored - Sold
2010 H-D Tri Glide Ultra Classic (Huh?)


Wayne

  • Administrator
  • Hero Member
  • *****
    • Posts: 1044
    • View Profile
Still getting the garage ready but decided to tear a few items off the bike between trapping squirrels this AM.  :)

Tach and speedo are not as bad as I thought but still need lots of work/$$. Some tools missing, bag is trashed and the headlamp bucket has a big piece out of it.


The original owner actually painted the bike without removing any of the parts. There is overspray everywhere!


[size=


kp

  • Administrator
  • Hero Member
  • *****
    • Posts: 1801
    • View Profile
Hi Wayne
I see you got a lens. I haven't even looked in my piles of parts so saves me that little chore. At least he used red paint  ;D
Cheers
Yabba Dabba KP


Wayne

  • Administrator
  • Hero Member
  • *****
    • Posts: 1044
    • View Profile
Yes KP, got 7 lens's from a guy just near me. Sent 4 off to Mark to help with his project. The overspray you see is more burgundy than red. Oh well, it will come off easily enough. Who knows, perhaps it helped to preserve some of the old parts.  :)
[size=


Wayne

  • Administrator
  • Hero Member
  • *****
    • Posts: 1044
    • View Profile
Pulled the clutch adjusting cover so I could remove the bars, cables etc. and here's what I found. The outside of the cover seemed fairly good, a slight imperfection but on the inside someone has spread some type of cement or epoxy. I have no idea why. I spoke with the last owner yesterday and he said he didn't do it. I guess on something over 40 years old you're likely to find just about anything!

« Last Edit: November 22, 2010, 08:58:17 pm by Wayne »
[size=


Wayne

  • Administrator
  • Hero Member
  • *****
    • Posts: 1044
    • View Profile
Did a little more tearing down tonight. To remove the exhaust I just decided to cut the old Jardine headers right off. Once the rear portion was removed I got down to getting the bolts out of the exhaust clamps. I thought these would be a nightmare but with a squirt of some liquid wrench 3 of the 4 loosend off with ease. #4 was rotten and twisted off. I should be able to get the last one out no problem. Regardless I slid the clamp off the pipe easily.

Rather than try to get the pipe off the flange at this point I decided to try the screws holding the flanges into the cylinder head. Again, some liquid wrench (gotta go with what's working for you!) and all but one screw came loose easily. I spun them out with my fingers. One screw seized (again in #4) so I soaked it and I'll give it a try tomorrow.

So, here's where we are so far. (keeping track of where everything goes is going to be a challenge but I'm carefully documenting everything and taking lots of pictures for myself.) I'm a bit tight for space with 2 projects but we'll just have to stay organized.


And a closeup:


My rear fender is in pretty decent shape except for some light rust and a couple of extra holes someone drilled in it. We'll weld those up, take out the imperfections and it will be as good as new.


I'm not sure what is on the underside of the fender. It could be old undercoat but it has a lot of dirt in it so I think it might be from an oiled road. They used to oil roads up here back in the day and I know where this bike lived and it was quite rural, so the chances are it was driven a lot on an oiled road. Regardless, it has preserved the underside of the fender beautifully! You can see it's almost prefect where I cleaned some off. Downside extra holes that need fixing. Upside, very well preserved underside. Oh, if anyone wants something from the sale flyers just let me know!  ;)

[size=


1941wld

  • Full Member
  • ***
    • Posts: 170
    • View Profile
Hi Mark,
That epoxy/coating is factory. It's on my also.


Wayne

  • Administrator
  • Hero Member
  • *****
    • Posts: 1044
    • View Profile
Hi Mark,
That epoxy/coating is factory. It's on my also.

Interesting. Do we know what purpose it serves? It's like cement. Perhaps helps to prevent dings???

You mixed the 2 threads up. 576/748 is my build. Marks is 97. Thanks for the info.
[size=