Honda CB750 Sandcast

Here we go! Restoring 576/748

Wayne · 180 · 58699

Steve Swan

  • Hero Member
  • *****
    • Posts: 2705
    • View Profile
    • cb750sandcastonly.com
A.S.S......  that's good.  Step One; We admitted we were powerless over A.S.S. and our A.S.S. was unmanageable   ;D  We shouild come up with some jokes....   :)  "How many A.S.S.es does it take to... ?  "What did one A.S.S. say ot the other A.S.S..... ?"


4363 frame, one of the down tubes had a 'string' of holes, larger to smaller, looked like where there had perhaps been a bad ground during the welding process ?  The holes were tear drop shaped, about 6-7 of them, largest was not quite the size of a match head, smallest was size of a pin head.


Wayne

  • Administrator
  • Hero Member
  • *****
    • Posts: 1044
    • View Profile
Anyone else wanna throw their 2 cents in before I close this hole up? While on the subject of frame holes, I could have sworn I read somewhere that there was a bulletin on drilling drain holes in the lower frame rails to prevent rotting. For some reason I thought 576 had them but it doesn't. I was thinking of shooting some "Rust Check" in those holes after paint, but they don't exist! Must have been a dream...or a vision!  ;D
[size=


Wayne

  • Administrator
  • Hero Member
  • *****
    • Posts: 1044
    • View Profile
Well, I did it! I decided the black parts weren't satisfactory from a gloss standpoint so I stripped everything and did them again myself. If you do it yourself I guess you have nobody to blame BUT yourself? ;) My painter did an excellent job as far as laying the paint on nice, it was just the level of gloss I wasn't 100% happy with. I bought Eastwoods Extreme Chassis Black High Gloss (80% gloss) with their epoxy primer made just for the product and went to work. After stripping the parts and cleaning well I shot the expoxy primer. You have to be careful with this stuff. It's as thin as water...but that's good as it keeps it thin. Only one coat is necessary. After 24 hours you can shoot the paint. I was AMAZED at the results I got from this paint. The only thing you have to watch is overspray. You have to work fast, you can't do sections or the overspray will come through as charcoal gray flecks on the next coat. After a few coats the parts looked great! I'll try and get a pic of the frame posted. I can't seem to do it justice indoors with my camera for some reason. I'll take it outside later and see how it turns out. :)

« Last Edit: November 02, 2012, 08:39:35 am by Wayne »
[size=


markb

  • Moderator
  • Hero Member
  • *****
    • Posts: 1249
    • View Profile
As you know I had a problem with my paint too only I thought mine was too glossy.  But I know exactly how you feel.  It's such a major part of the restore that you want to get it right.  It's next to impossible to get good pics of the black parts but it looks good to me.  I'm happy it worked out for you.
Mark B
1969 CB750 sandcast #97 restored - Sold Restoration thread link
1969 CB750 sandcaxt #576 - Sold
1969 CB750 sandcast #1553 - Sold
1969 CB750 sandcast #1990 - Sold
1969 CB750 sandcast #5383 restored - Sold Restoration thread link
1970 CB750 K0 restored - Sold
2010 H-D Tri Glide Ultra Classic (Huh?)


Wayne

  • Administrator
  • Hero Member
  • *****
    • Posts: 1044
    • View Profile
OK, tried a couple of frame pic's...still inside. My wife isn't too thrilled about them being in front of the fireplace in the downstairs family room but she understands they need to be "baked" for a while! ;)


Color is a bit off in this shot. You will have to believe me, it's black!

[size=


UK Pete

  • Sr. Member
  • ****
    • Posts: 337
    • View Profile
That looks great Wayne, your wife is understanding letting you bring it in the house, i have completely taken over the outside of my house , but she wont let me in the house with bike bits, saying that she has no idea there is two bikes in the roof space
Pete


Wayne

  • Administrator
  • Hero Member
  • *****
    • Posts: 1044
    • View Profile
Lucky number "8" makes another appearance! I don't recall noting this earlier. After stripping and spraying a thin coat of epoxy primer on my swing arm another "8" was staring me right in the face. As you can see it's a stand alone number "8". Perhaps my Daughters friend is correct that the Japanese just believed that 8's were lucky and would bring success and good fortune with this endeavor???

[size=


Prospect

  • Jr. Member
  • **
    • Posts: 65
    • View Profile
Lucky number "8" makes another appearance! I don't recall noting this earlier. After stripping and spraying a thin coat of epoxy primer on my swing arm another "8" was staring me right in the face. As you can see it's a stand alone number "8". Perhaps my Daughters friend is correct that the Japanese just believed that 8's were lucky and would bring success and good fortune with this endeavor???


That's possible. Eight is considered "prosperous" in Japanese culture. Good thing they aren't fours as those numbers signify death.
« Last Edit: November 13, 2012, 03:31:17 pm by Prospect »
Vin 256/106


Wayne

  • Administrator
  • Hero Member
  • *****
    • Posts: 1044
    • View Profile
I'll try to answer this question best i can.  Please anyone else share what you know or if this in incorrect or incomplete.

Not counting the final driven shaft, there are five parts that make up the early version of the chain oiler that came with these bikes.

There was enough concern on this issue by Honda, that two Service Bulletins were issued about this particular chain oiler.  I'll try to keep this as 'unwordy' as i can, for the sake of clarity.

Service Bulletin #5 discusses drive chain lubrication adjustment and lists the six parts including the final driven shaft, which make up the chain oiler.  The parts referred to in SB #5, are the same parts which can be seen on pages 44-47 of the first printings of the CB750 Parts Manuals.

Before discussing the oiler adjuster, on end of driven shaft (opposite counter shaft sprocket) bolted to crankcase is the "final drive shaft oil guide," or, if you will, splash pan.  Oil lying in crankcase went into this "guide" pan, then passing through the drive shaft, thru the felt element and out a hole in shaft to sprocket and chain.  If your felt element was inside the shaft but there was no final shaft plug, i suppose it's safe to say there was not enough pressure in the crankcase to push out the felt element and/or you were just lucky the felt element did not come out on it's own.  Seems, if i recall correctly, the felt element was sort of a tight fit, but not that tight.  This felt element is really nothing more than a sort of porous plug.

Anyway, speaking of the actual oil flow adjuster, there originally was a 1.5mm shim (#27, pn 90443-500-000) washer which held the final shaft plug in a set position, thereby pressing against the felt oil element, inside the final driven shaft, intended to allow only a certain amount of oil to leak thru the felt element, then thru the hole in the final driven shaft and onto the outside of the shaft, spinning the oil onto the sprocket and the chain.  SB #5 discusses replacing the 1.5mm washer with a 1mm washer to decrease oil flow or add an "substitute" shim washers of different ticknesses to the 1.5mm washer to increase flow.  Use of these different thickness washers was intended to more or less compress the felt element in an attempt to control oil flow thru the felt element flowing out the hole in the final driven shaft.  

Service Bulletin #22 refers not only to a different thickness washer but also a "modified oil reserve element" to attempt to control oil flow out the hole in the driven shaft.  I've not done enough research to know if there were part numbers for the shims that were different sizes from the 1.5mm shim.  SB #22 states this different thickness washer and modified element are to be used on engine numbers before 10,915.

Then, there is SB #17 which discusses adjustment of an entirely new chain oiler adjuster, beginning engine number 26,144.  I may be mistaken, but i believe this new chain oiler had a different driven shaft, making the new oiiler adjuster not interchangeable with early felt type.

The K1 parts book shows the early and the later (as noted in SB #17) chain oiler adjuster.  In the K1 parts book, i don't see any mention of the different thickness washers nor the "modified element" as noted in SB's #5 or #22.

The original chain oilers were a challenge to adjust properly and keep adjusted.  They allowed an oil puddle to form when the bike was parked on the sidestand.  With time, the felt would allow more or less leakage or none at all; usually not the case.  Honda came out with the longer (55mm) chain guard to deflect the oil to the ground instead of up the rider's or passenger's back.  SB #22 mentions all frame numbers before 21,880 could have the "modified" guard installed free of charge.

Writing this, i do remember, again, my rolled up sleeping bag, bungeed to the passenger portion of the seat, getting oil on it, during my trip out and back to California, May 1970.

These chain oil adjusters were nothing more than an attempt to control a deliberately designed engine oil leak.

Would be interested to know if Mark's E100 retains it's early adjuster.

Steve, your knowledge of these bikes never ceases to amaze me. Talk about detail! So as I mentioned my engine only had the felt and the felt setting washer in it. From the looks of the threads in the final shaft I would be surprised if there was ever anything else in there. Since I don't really want a functional chain oiler anyway I'm just going to block it. I was thinking of putting a set screw in place of the plug. Just have to figure out what the thread dimensions are. If the next owner wants to make it more "original" it's just a matter of adding the missing pieces. Thoughts?? Anyone know what thread that plug is?
[size=


Wayne

  • Administrator
  • Hero Member
  • *****
    • Posts: 1044
    • View Profile
It's been a while so I thought I better post SOME progress! I almost have the bottom end together of the engine. Was just waiting on a couple of bearings which are now here so will get that done soon and post up some pic's.

Fighting the flu so I haven't been able to take too much on since Christmas. Went out yesterday and retrieved my alternator cover for a look and to see what work we had to do there to get it ready. It's in pretty decent shape and much to my surprise it has the "smooth" background behind the Honda logo. I understand this feature makes it a bit rarer than the standard thin lipped cover. :) And now the bad. (always bad with good) I could only get 3 of the 4 stator screws out. :( I'm going to have to drill the head off the last one and see if I can get it removed. Damn!


I have also been tossing around what to use for a wiring harness on 576. It has an 0400 harness but it's in tough shape, been cut into etc etc. I ordered in a 32100-300-050 Honda harness for a look and made some comparisons. We already knew about the 2 extra wires at the headlamp loom sleeve, no big deal there. Connector for connector, it looks good. The primary areas of concern are branches of the harness that are taped and not contained within a loom sleeve like the original.


My intention was to find a harness and make it as close as possible to an 0400 harness. I made up a template to print off some loom tags with waterproof ink on vinyl, which I would then install in place of the newer tag.


« Last Edit: January 10, 2013, 07:05:47 pm by Wayne »
[size=


Prospect

  • Jr. Member
  • **
    • Posts: 65
    • View Profile
I thik it's fine to go with a new wiring harness especially if you plan on riding the bike vs. a museum piece.  The old wiring has too much corosion and increases resistance for a consistent charge and reliable electrics.  My 256 has a rough harness as well and I think it's beyond saving and I'll use a new one.  I've used new on my k1 and the peace of mind is worth it.  Those alternator screws can be tough.  I assume you've tried an impact driver? Good luck and hope you feel better. 
Vin 256/106


Wayne

  • Administrator
  • Hero Member
  • *****
    • Posts: 1044
    • View Profile
My machinist was able to get the screw out of my Alternator Cover without a problem and no damage! :) Whew! So, on to some cleanup and to try and see what lay under what was left of some of the original clear coat. I was hoping from that I could finally set a direction on how I would finish out my aluminum engine components.

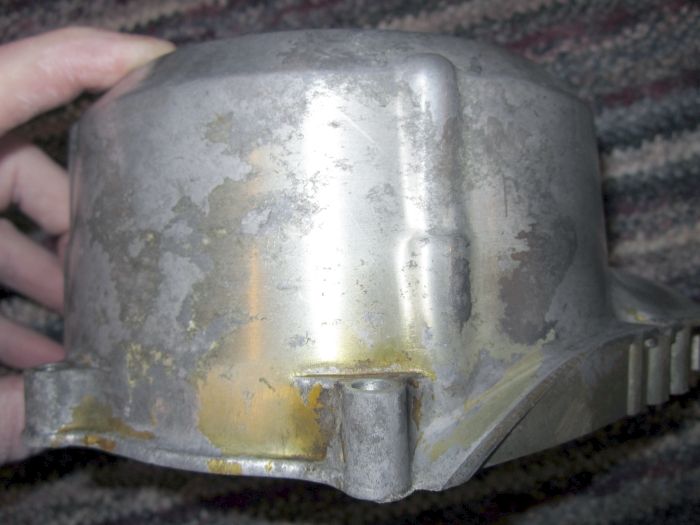
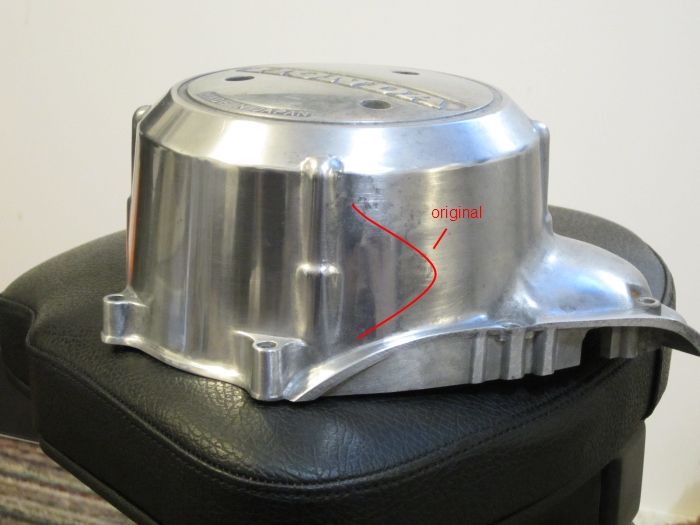
First I de-greased, washed the cover and cleaned it up a bit with Never Dull. I chose never dull as it's a corrosion remover and my thinking was it may not polish out the original buffing lines from the factory. (wishful thinking?) Anyway, here's what it looked like after cleanup. Still a good bit of clear to the left of the boss for the stator screw.


Another shot showing clear in a non finished or visible area wen installed.


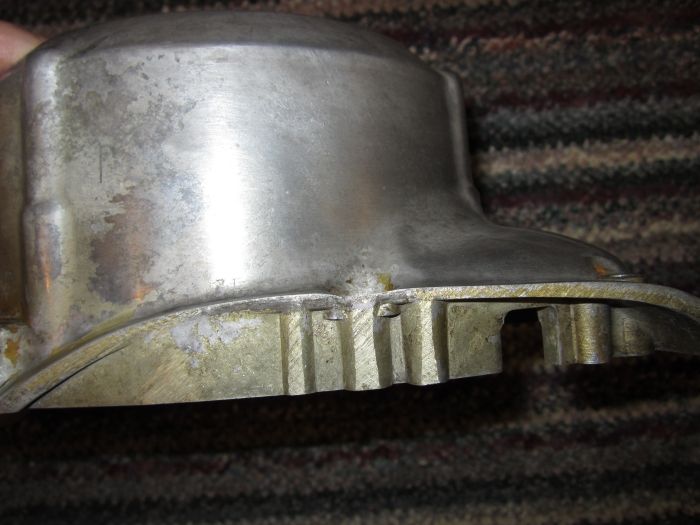
This shows the clear coat removed. Again, to the left of the stator screw boss you can see where I have now removed the clear coat. My objective was to match that area. I sanded to the right of the boss with 1000 and then 2000 grit wet sandpaper. It seemed to give me the lines I was looking for but appeared more brushed, duller than the patch that was under the original clear coat. Again, I just used Never Dull as it's non abrasive (I think) and gently polished the area until I got a close match. (right of stator screw boss) The sanding lines still show through and match the untouched portion of the cover pretty closely. I cleaned it with some metal prep to ensure it would retain the same appearance prior to applying clear coat.


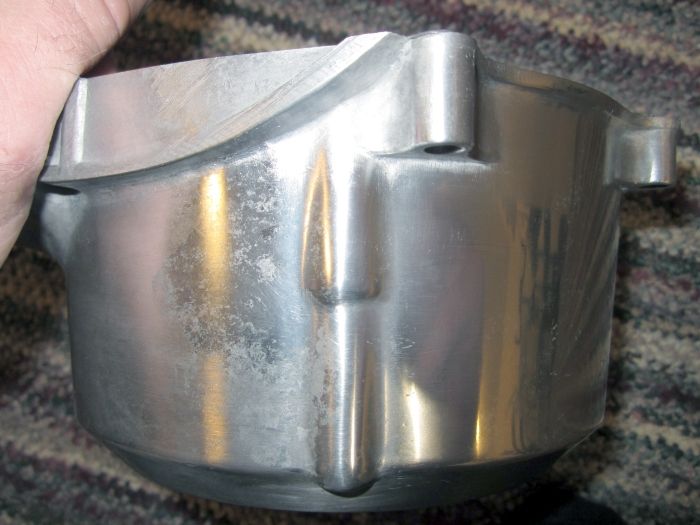
This is the 'from 2 feet shot". I think it is what I'm looking for. SO, now that I have my technique down it's time to remove the bad pits, scratches and get these pieces finished!  ;D I guess slow progress is better than none!


Just cotton wadding and some pretty smelly, oily stuff.  ???

« Last Edit: January 18, 2013, 09:05:53 am by Wayne »
[size=


UK Pete

  • Sr. Member
  • ****
    • Posts: 337
    • View Profile
Looks like you have mastered the original finish Wayne, your in for some man hours now doing all the various covers, i should really make a start on mine, but need to get back that enthusiasm i was on a roll with before christmas
Pete


kp

  • Administrator
  • Hero Member
  • *****
    • Posts: 1801
    • View Profile
Looks like you have mastered the original finish Wayne, your in for some man hours now doing all the various covers, i should really make a start on mine, but need to get back that enthusiasm i was on a roll with before christmas
Pete
Arrrr! too many Speckled Hens I suspect  :D
Yabba Dabba KP


markb

  • Moderator
  • Hero Member
  • *****
    • Posts: 1249
    • View Profile
Arrrr! too many Speckled Hens I suspect  :D
??? Another Aussie phrase that I don't know the meaning of.
Mark B
1969 CB750 sandcast #97 restored - Sold Restoration thread link
1969 CB750 sandcaxt #576 - Sold
1969 CB750 sandcast #1553 - Sold
1969 CB750 sandcast #1990 - Sold
1969 CB750 sandcast #5383 restored - Sold Restoration thread link
1970 CB750 K0 restored - Sold
2010 H-D Tri Glide Ultra Classic (Huh?)