Honda CB750 Sandcast

Restoration of Sandcast #97

markb · 814 · 333600

kmb69

  • Sr. Member
  • ****
    • Posts: 307
    • View Profile
Mark, I believe you are correct and I was wrong with my first post. I did some further research and found the early spark advancers, -005, were Hitachi with no slots. An early, 7-69, Parts Catalog calls for the -005 and all Hitachi parts on the points plate. The -154 is a TEC with the slots. Not sure when it changed. Lucky me, I have a NOS, -005 that's now destined for E69 unless I learn something different. Keith


markb

  • Moderator
  • Hero Member
  • *****
    • Posts: 1249
    • View Profile
Keith,
Thanks for the confirmation.  Does your -005 look like the advancer on the right in my pictures in post #500?
Thanks,
Mark
Mark B
1969 CB750 sandcast #97 restored - Sold Restoration thread link
1969 CB750 sandcaxt #576 - Sold
1969 CB750 sandcast #1553 - Sold
1969 CB750 sandcast #1990 - Sold
1969 CB750 sandcast #5383 restored - Sold Restoration thread link
1970 CB750 K0 restored - Sold
2010 H-D Tri Glide Ultra Classic (Huh?)


kmb69

  • Sr. Member
  • ****
    • Posts: 307
    • View Profile
Yes Sir, it does. I will try to post some pics and additional info later today.


markb

  • Moderator
  • Hero Member
  • *****
    • Posts: 1249
    • View Profile
I’m working on getting my engine covers ready to assemble.  I decided to tackle the hardest part – paint the black on the alternator cover logo.  I’ve got two polished and clear coated so I am going to do them both.  First step – mask them.  I don’t worry about getting right on the edge but the closer you get the less paint you have to remove.


Next step painting.


Last step – remove the masking and the excess paint.  I used to use a different clear coat that wasn’t affected by acetone.  This clear is so my plan was to use alcohol to wipe the paint off.  I did a test on piece of aluminum that I had sprayed with my covers, wiped right off.  So I had a little panic attack when I did it for real.  I must have let it dry a bit too long but I finally got it off.  Whew!  It’s kinda fun to see two smooth logo, thin-lipped alternator covers side-by-side.  :D

Mark B
1969 CB750 sandcast #97 restored - Sold Restoration thread link
1969 CB750 sandcaxt #576 - Sold
1969 CB750 sandcast #1553 - Sold
1969 CB750 sandcast #1990 - Sold
1969 CB750 sandcast #5383 restored - Sold Restoration thread link
1970 CB750 K0 restored - Sold
2010 H-D Tri Glide Ultra Classic (Huh?)


Prospect

  • Jr. Member
  • **
    • Posts: 65
    • View Profile
Came out rally nice.  Those thin lip alternator covers are extremely hard to find.  I've never seen one for sale. Nice to have two!
Vin 256/106


markb

  • Moderator
  • Hero Member
  • *****
    • Posts: 1249
    • View Profile
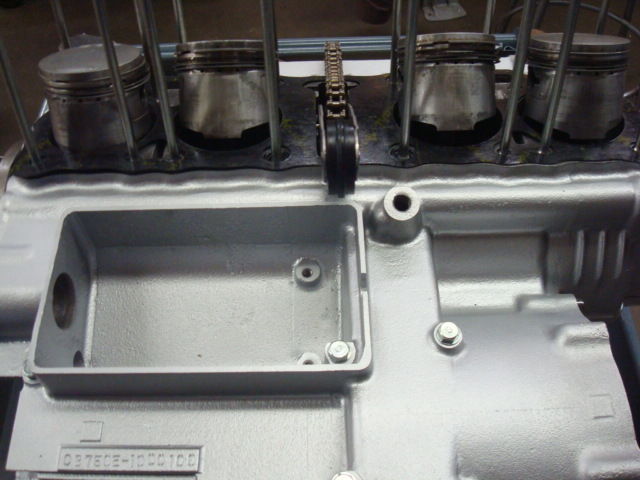
I know, I know, you guys are going to think I’m nuts.  I have been striving to restore this engine as accurately as possible.  After having it pointed out to me that the original engines didn’t have green gaskets, I decided to correct it. :o It was a bit of a challenge finding original black gaskets but I found them.  Here is the engine with the new cylinder base gasket installed. 

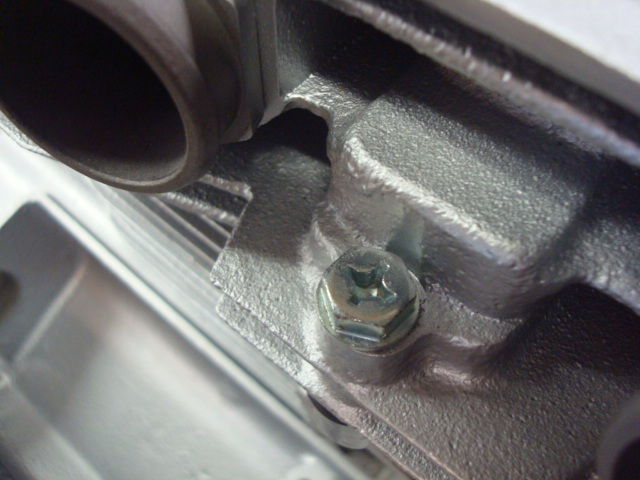
While I was at it I changed out the 6mm head screws.  When I tore the engine down four of them were a hex head but only one was the special cross hex head that’s called out in the parts manual.  It was mixed in with the four that are under the cam towers.  I initially decided to put it back together the same way.  Then I remembered that a previous rebuild I needed to by one and could not get the cross hex head so the hex head version is probably a later part.  This engine had definitely been apart and not put together completely right.  For example, it had six 6mm studs on the head instead of four.  So I think there is a good chance that the special cross heads were replaced.  The special screw on the back side of the head is also a distinction listed on this site that goes up to E1106 so now that’s what I put there.


I looked through all my fasteners and the screws that I have from other sandcast engines are the special cross head screws.  So now the other four are the specials too.  I’m pretty convinced that this is correct.  It doesn’t matter now.  It’s not coming apart again. ;) By the way, the puck hole isn’t dirty like it looks in the picture.  Must be something with the flash or lighting.
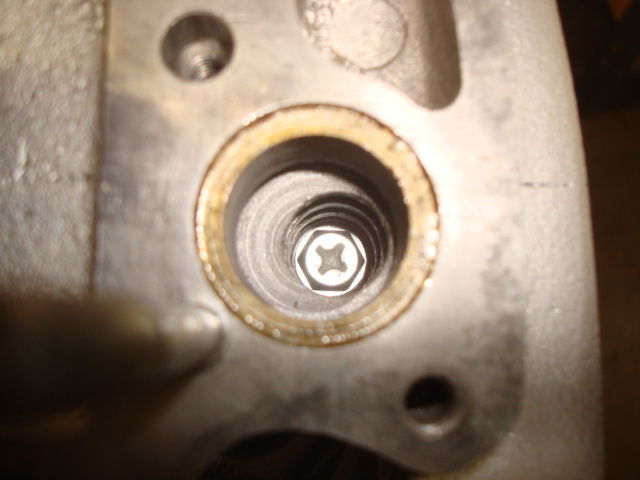

Altogether it took me a little over 4 hours, not including letting it sit overnight and retorqueing the head, and including adjusting the tappets.  It sure makes a difference when it comes apart easy and everything is clean.  I hate to say it but it was kinda fun.  I’m glad I did it.  If any of you see something else that you don’t think is correct let me know.
Mark B
1969 CB750 sandcast #97 restored - Sold Restoration thread link
1969 CB750 sandcaxt #576 - Sold
1969 CB750 sandcast #1553 - Sold
1969 CB750 sandcast #1990 - Sold
1969 CB750 sandcast #5383 restored - Sold Restoration thread link
1970 CB750 K0 restored - Sold
2010 H-D Tri Glide Ultra Classic (Huh?)


markb

  • Moderator
  • Hero Member
  • *****
    • Posts: 1249
    • View Profile
Making some progress.  Got the oil pump installed.


Here’s my early oil pan ready to install.  No green gaskets here.


Unpainted oil pan in place.

Mark B
1969 CB750 sandcast #97 restored - Sold Restoration thread link
1969 CB750 sandcaxt #576 - Sold
1969 CB750 sandcast #1553 - Sold
1969 CB750 sandcast #1990 - Sold
1969 CB750 sandcast #5383 restored - Sold Restoration thread link
1970 CB750 K0 restored - Sold
2010 H-D Tri Glide Ultra Classic (Huh?)


markb

  • Moderator
  • Hero Member
  • *****
    • Posts: 1249
    • View Profile
Ready to put on the valve cover.  I found a couple of different gaskets.


I’m not sure why but the one on the right has extra material on the rear, side corners.  I believe the one on left is the correct one so that’s what I’m using.


Here’s a shot of the inside of the early waffle valve cover.  It’s too bad that one of the most signature features of the real early engines has to be covered up.  :(


Here’s something that’s giving me a headache.  Notice the difference in the original screws and newer replacements.  The originals have an average of 15mm of thread for almost any length screw.  The new ones are threaded all the way.  I’ve been trying so hard to use all correct screws and so far with screws from several engines I’ve come up with enough.  I think I might come up short though.  I might have to temporarily use some new ones and change them out as I find them.  I don’t even know why I think about these things. ::) Has anyone replaced theirs with new (or worse yet, stainless :o) and have some decent originals they could sell?


So here’s the valve cover and breather cover in place.  Little by little.

« Last Edit: January 04, 2015, 03:42:09 pm by markb »
Mark B
1969 CB750 sandcast #97 restored - Sold Restoration thread link
1969 CB750 sandcaxt #576 - Sold
1969 CB750 sandcast #1553 - Sold
1969 CB750 sandcast #1990 - Sold
1969 CB750 sandcast #5383 restored - Sold Restoration thread link
1970 CB750 K0 restored - Sold
2010 H-D Tri Glide Ultra Classic (Huh?)


markb

  • Moderator
  • Hero Member
  • *****
    • Posts: 1249
    • View Profile
On to the clutch cover.  I’m not sure but I think the 10-hole gasket will work.  I was able to find a black 9-hole version.


Cover in place.  I’m really happy I went with the black gaskets.  The green gasket would have been very visible here.  I’m sure I would not have liked it.

Mark B
1969 CB750 sandcast #97 restored - Sold Restoration thread link
1969 CB750 sandcaxt #576 - Sold
1969 CB750 sandcast #1553 - Sold
1969 CB750 sandcast #1990 - Sold
1969 CB750 sandcast #5383 restored - Sold Restoration thread link
1970 CB750 K0 restored - Sold
2010 H-D Tri Glide Ultra Classic (Huh?)


markb

  • Moderator
  • Hero Member
  • *****
    • Posts: 1249
    • View Profile
Next, alternator cover.  I was lucky enough to pick up a NOS coil.  Just to make sure I put the ohmmeter on it and measured 7 ohms – close enough to the factory spec.


Also got a NOS stator.  It checked out too.


Ready to put it together with my short-threaded screws. ;)


Ready to mount on the engine.


Things were going good and then came to a grinding halt.  I need to get the starter motor in so I can mount the alternator cover.  I had also picked up a NOS starter motor years ago.  I decided I should test it too before I put it in just to make sure it was OK.  Should be a simple test.  Battery, jumper cables, negative terminal to the case, positive to the cable for a couple of seconds.  Nothing happened.  Is there a reason this shouldn’t work?  I’ve got a couple motors stored away.  I guess I’ll have to dig them out.  I was on a roll and I really thought I would be pretty close to getting the major engine parts together this weekend.  Oh well.  ::)

Mark B
1969 CB750 sandcast #97 restored - Sold Restoration thread link
1969 CB750 sandcaxt #576 - Sold
1969 CB750 sandcast #1553 - Sold
1969 CB750 sandcast #1990 - Sold
1969 CB750 sandcast #5383 restored - Sold Restoration thread link
1970 CB750 K0 restored - Sold
2010 H-D Tri Glide Ultra Classic (Huh?)


markb

  • Moderator
  • Hero Member
  • *****
    • Posts: 1249
    • View Profile
I dug out the best of my other starters and tried the same test and it worked.  Then I compared the two and found that what I thought was an early NOS starter isn’t even the same, as you can see in the photo.  :o The one on the left is the “NOS” one.  Probably for a later diecast.  I bought it several years ago and supposedly it was an early one and it came in a Honda box with the correct part number.  I never really looked that close at it, just put in on the shelf waiting to install.  Looking closer at it now I think maybe it might have been used or at least installed.  ???  I think I got scammed.  I’m glad I tested it or I would have installed an incorrect part and it would have sucked to have to replace it later.  ::)
Mark B
1969 CB750 sandcast #97 restored - Sold Restoration thread link
1969 CB750 sandcaxt #576 - Sold
1969 CB750 sandcast #1553 - Sold
1969 CB750 sandcast #1990 - Sold
1969 CB750 sandcast #5383 restored - Sold Restoration thread link
1970 CB750 K0 restored - Sold
2010 H-D Tri Glide Ultra Classic (Huh?)


4pots1969

  • Hero Member
  • *****
    • Posts: 760
    • View Profile
Mark,
Just a little advice...
Open the starter and check the state of wear of the brush (coal) and take advantage also to see the state of the collector on the rotor and clean... On my coal, wear was more than 70% ......
Careful to respect order and the meaning of the white washer and shim washers...
A photo before removing, is that there are better!
In the event that...
http://www.ebay.com/itm/New-Genuine-Honda-Starter-Motor-Rebuild-Kit-68-78-CB450-CB500-CB550-CB750-H14-/271729708545?pt=Motorcycles_Parts_Accessories&hash=item3f445a4e01&vxp=mtr#ht_3121wt_662

Gerard
« Last Edit: October 16, 2018, 04:31:13 am by 4pots1969 »


markb

  • Moderator
  • Hero Member
  • *****
    • Posts: 1249
    • View Profile
Gerard,
Great advice.  I'll plan on doing that.  Thanks for the link too.
Mark
Mark B
1969 CB750 sandcast #97 restored - Sold Restoration thread link
1969 CB750 sandcaxt #576 - Sold
1969 CB750 sandcast #1553 - Sold
1969 CB750 sandcast #1990 - Sold
1969 CB750 sandcast #5383 restored - Sold Restoration thread link
1970 CB750 K0 restored - Sold
2010 H-D Tri Glide Ultra Classic (Huh?)


markb

  • Moderator
  • Hero Member
  • *****
    • Posts: 1249
    • View Profile
I got my rebuild kit and I’m ready to tear into the starter.  The first thing I noticed is there are marks that show where the end caps line up.


There was quite a bit of carbon dust in it.


I cleaned up everything real good and here’s the new springs and brushes installed.


I tested it and it ran fine.  Here‘s the starter in the engine.  By the way I did tear apart the “NOS” starter.  It looked like brand new inside.  The reason it wouldn’t run is the armature is stuck.  I tried tapping it with a hammer and it wouldn’t come out.  I didn’t hit it real hard.  I’ll look closer at it later.

« Last Edit: January 18, 2015, 06:59:15 pm by markb »
Mark B
1969 CB750 sandcast #97 restored - Sold Restoration thread link
1969 CB750 sandcaxt #576 - Sold
1969 CB750 sandcast #1553 - Sold
1969 CB750 sandcast #1990 - Sold
1969 CB750 sandcast #5383 restored - Sold Restoration thread link
1970 CB750 K0 restored - Sold
2010 H-D Tri Glide Ultra Classic (Huh?)


markb

  • Moderator
  • Hero Member
  • *****
    • Posts: 1249
    • View Profile
I ran into another snag.  I have a NOS breaker assembly that I installed.  I got the point gap adjusted and went to set the timing and found that the plate fit very tightly into the mounting on the case.  Even with the three screws out I couldn’t turn the plate.  So I took all the parts from the NOS plate and mounted them on a decent used plate.  Fits perfect and I can rotate it easily.  In the process I found that there are differences in the plates.  The early version is on the left.  The main difference is in the lubricating pad mount.


I reset the gaps and then worked on setting the timing.  The 1-4 adjustment is just about to the end of the slots.  The 2-3 adjustment is to the end of the slots and just to the position where the points are opening and in the direction it should go relative to how much 1-4 is off.  Has anyone seen this before?  It just seems odd to me that I would be right at the limits.  I compared the parts to make sure the ones I swapped were the same.  Something tells me it might have something to do with the spark advancer.  I tore everything apart and checked the spark advancer and everything seems OK.  Put it back together and the same thing.  I’m just not feeling good about it.  Could it be the cam on the spark advancer is worn.  Any thoughts?

Mark B
1969 CB750 sandcast #97 restored - Sold Restoration thread link
1969 CB750 sandcaxt #576 - Sold
1969 CB750 sandcast #1553 - Sold
1969 CB750 sandcast #1990 - Sold
1969 CB750 sandcast #5383 restored - Sold Restoration thread link
1970 CB750 K0 restored - Sold
2010 H-D Tri Glide Ultra Classic (Huh?)