Honda CB750 Sandcast

1969 Diecast/ K0 restoration

UK Pete · 135 · 64328

UK Pete

  • Sr. Member
  • ****
    • Posts: 337
    • View Profile
Hi all , i have been thinking as to which way i shall proceed with my K0 at first i was going to get it MOT'd register it and ride it as is for a year or so while i have a chance to gather parts to restore, but on closer inspection i have found the front end needs a total overhaul, so does the back end (swing arm bushes, missing spoke in rear wheel), and even worse the engine leaks oil from the cylinder head quite badly, so it is pretty much decided that i will tear it down and get stuck in with a restoration now rather than later, To kick things off i got the bike running , just needed a bit of work on the carbs, then rode the bike around to get the feel what was in need of doing, that is when it became apparent that both front and rear ends were bad, and it was clear the oil leak was more than just a drip, i cleaned up any chrome bits to access what was salvagable and what was to replace, it tuns out the double cut front guard is really solid with speckles of rust and a couple of small dings that are easily repaired, so that is on the re-chrome list


The rear guard is also in reasonable shape, and being the original well worth salvaging so that is also on the re-chrome list, again like the front it has a bit of mild surface rust , and a few dents, but the dents are where the rear light has been knocked and so are mostly hidden, the underside has been protected with some sort of wax oil and is really well preserved, as for the rear light bracket i have A NOS bracket, and chrome rear light back, the original lens is salvageble with a bit of polishing so all is good


« Last Edit: November 26, 2012, 02:47:33 am by UK Pete »


UK Pete

  • Sr. Member
  • ****
    • Posts: 337
    • View Profile
More pictures of the strip down

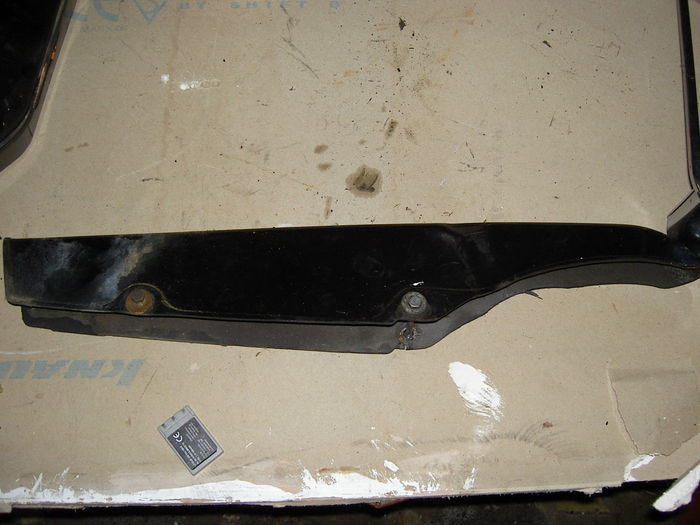
Short plastic chain guard, it is all there, in dirty but good condition, luckily as reproduction ones are almost £200
originals very hard to come by


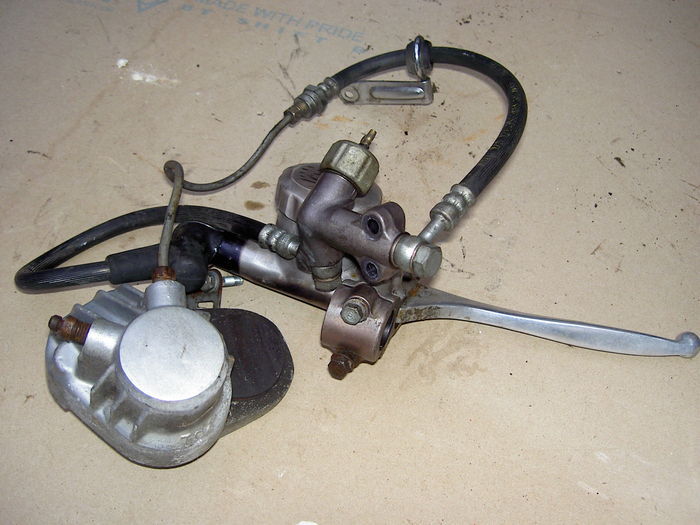
Front brake all in good condition, just a bit of fading to the anodised parts


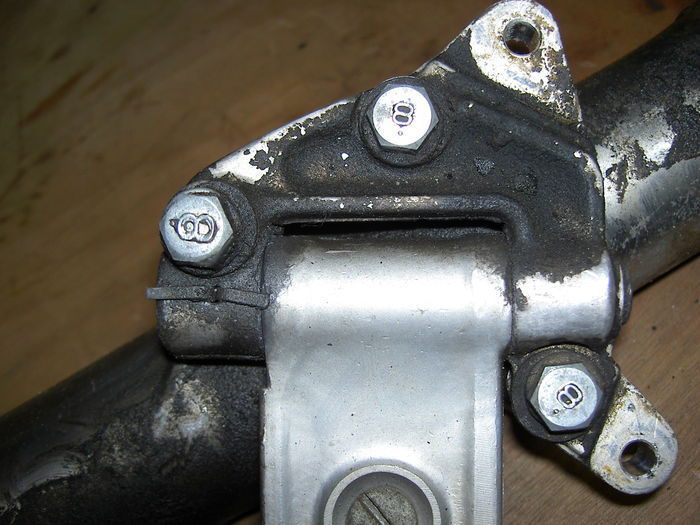
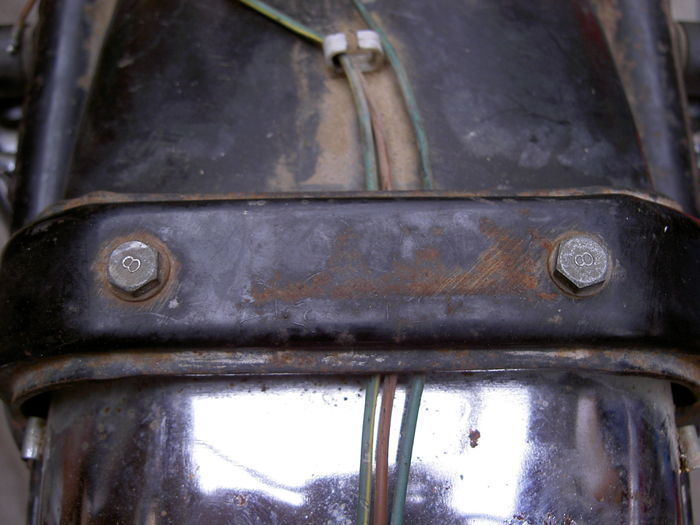
the original no 8 bolts in great condition, they will clean up nicely so a few less to zinc plate


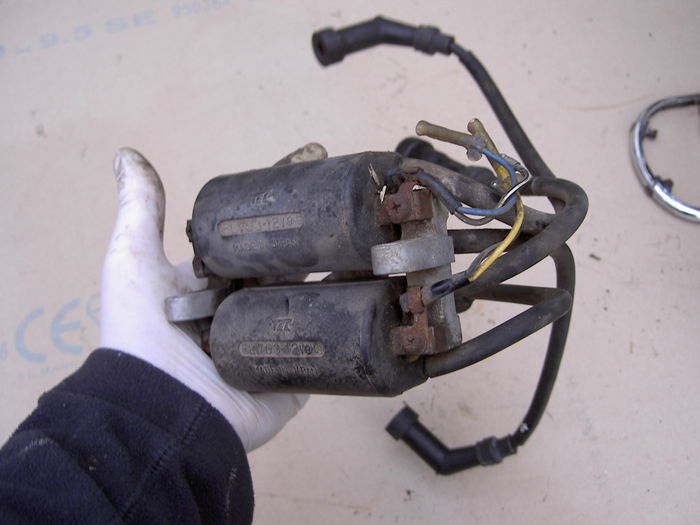
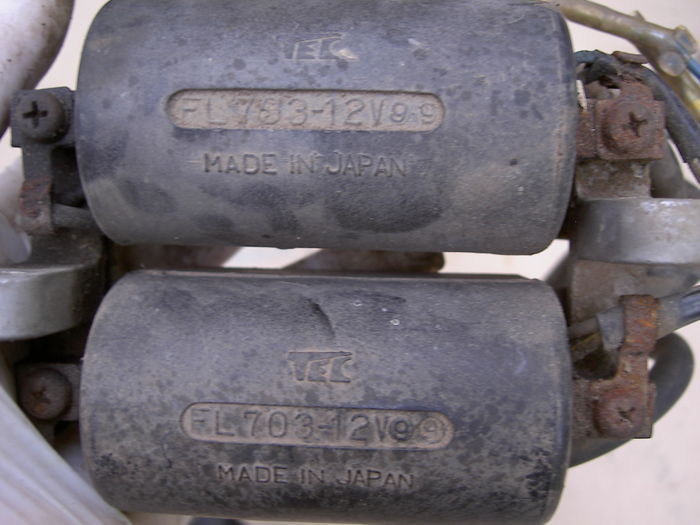
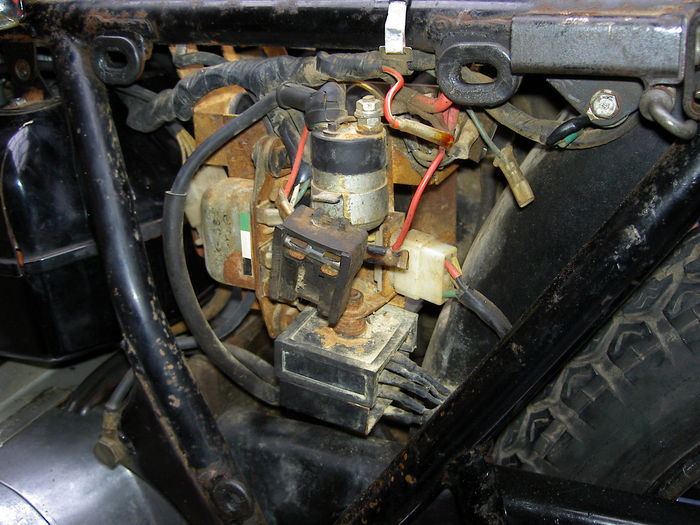
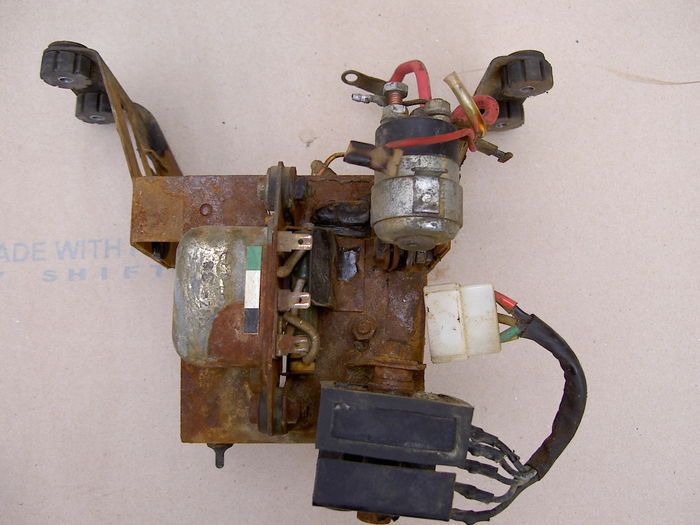
Coils looking a bit worse for wear but considering the bike ticked over like a swiss watch at only  800 rpm, and reved cleanly from there upwards means to me they are worth keeping and restoring


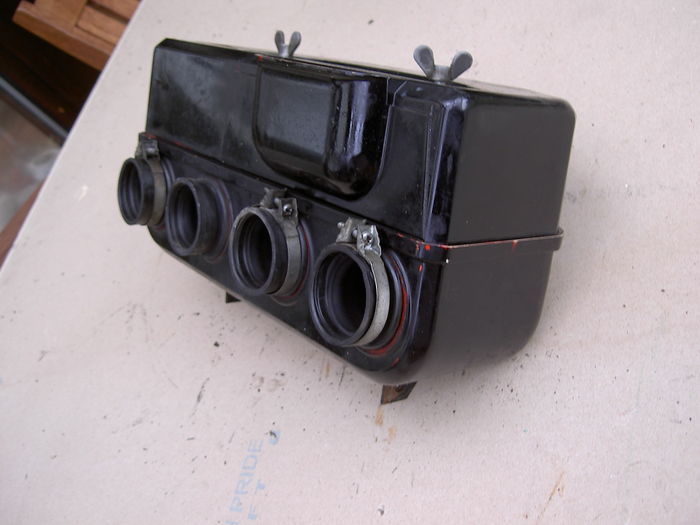
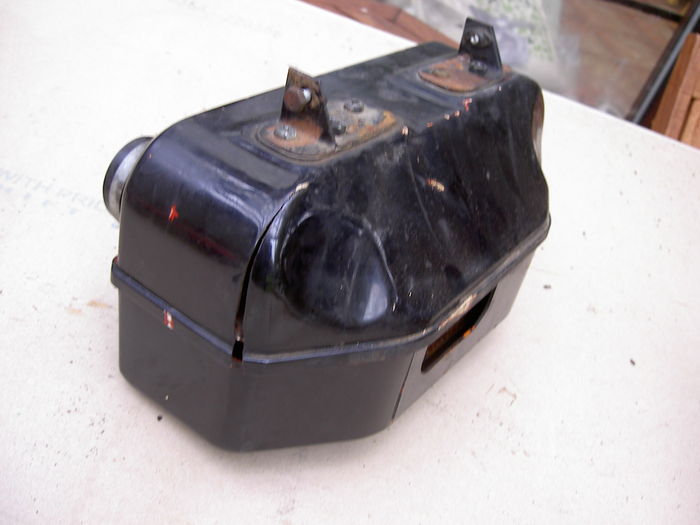
Original airbox, looks to be repairable , although i do have a nice new LPM one which i might use


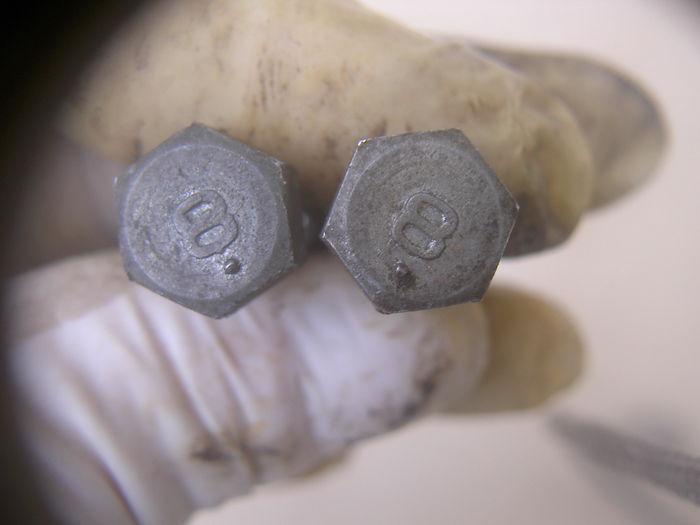
More of those lovely no 8 bolts, i think they were only on the pre K1 models


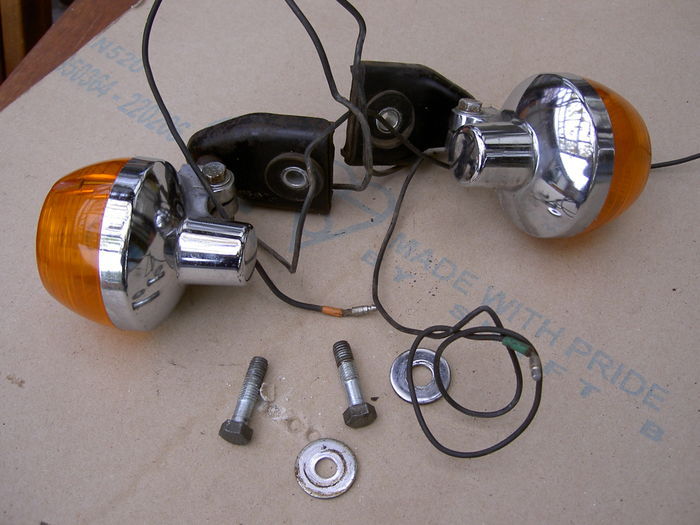
Rear indicators and mountings , amazing condition, perfectly usable, just need to paint the brackets


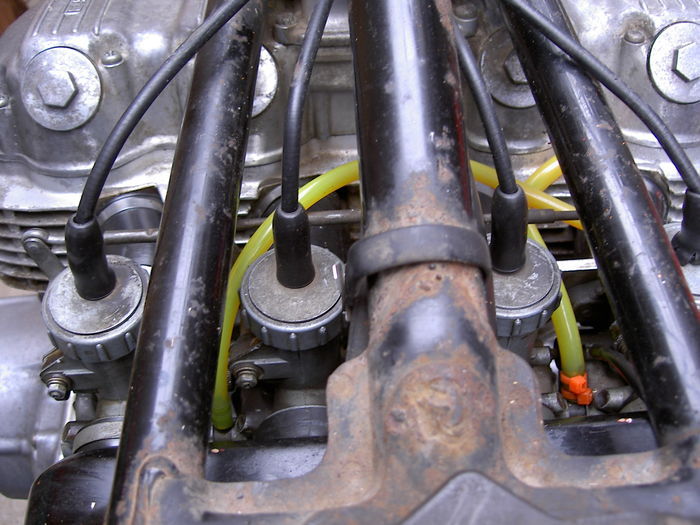
Carbs with the 4 seperate cables, apparently a bit awkward to set up properly,, but all there and working good


Surprisingly all the electrics worked faultlessly, but i will have my work cut out restoring this lot


Swing arm a bit of rust , but structuraly sound


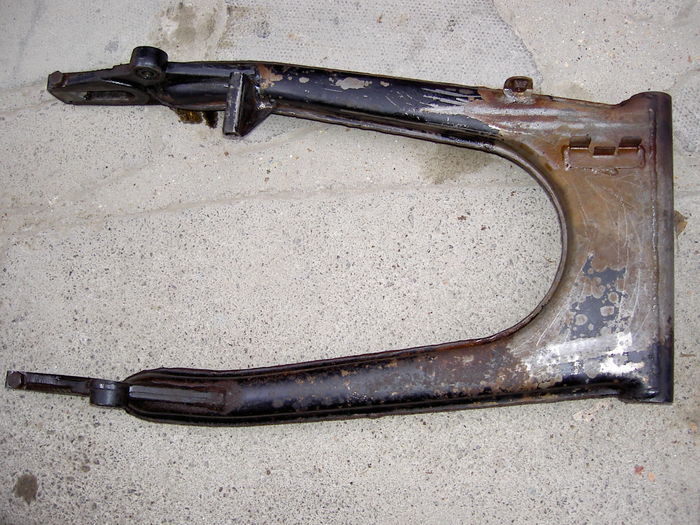
Swing arm bearings are metal in this one, and were a real pig to get out


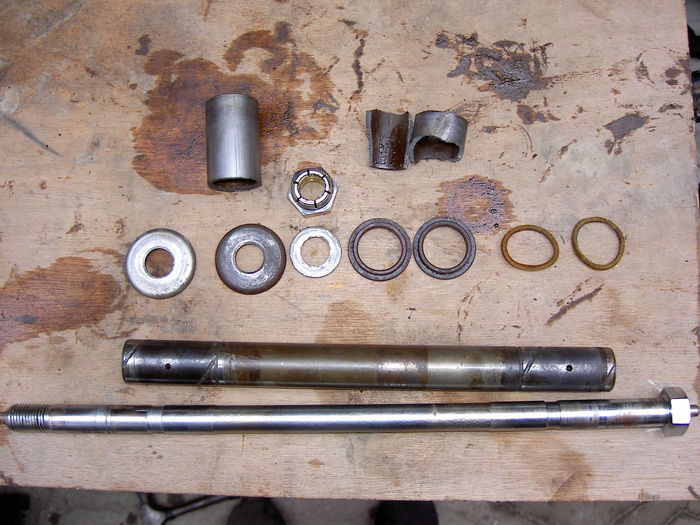
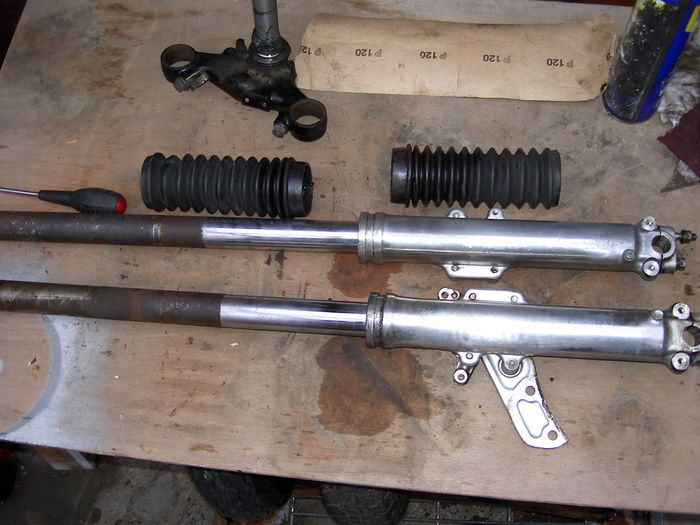
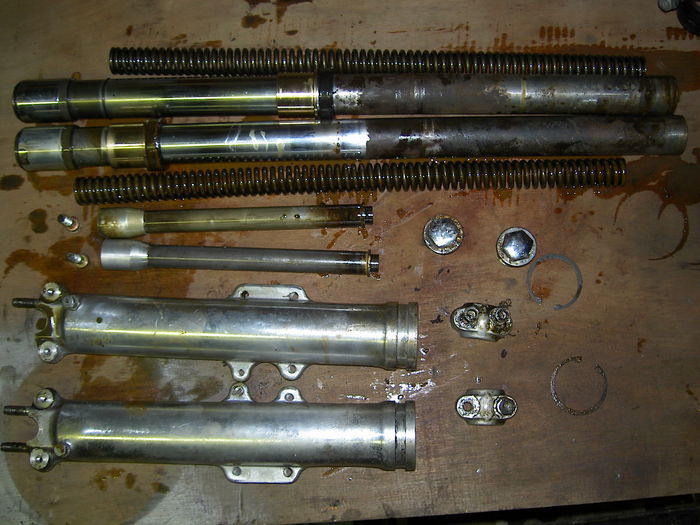
Front forks , need total overhaul, the chrome is good , but strangely Honda chose to only chrome the area of travel, the rest is bare steel so it goes rusty


Fork internals, had a right job getting one of the retaining circlips out, also they had a mix of water and very smelly discoloured oil in them


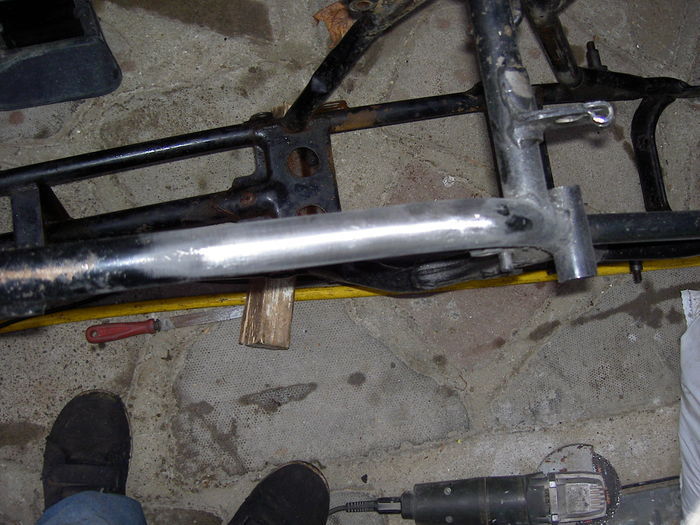
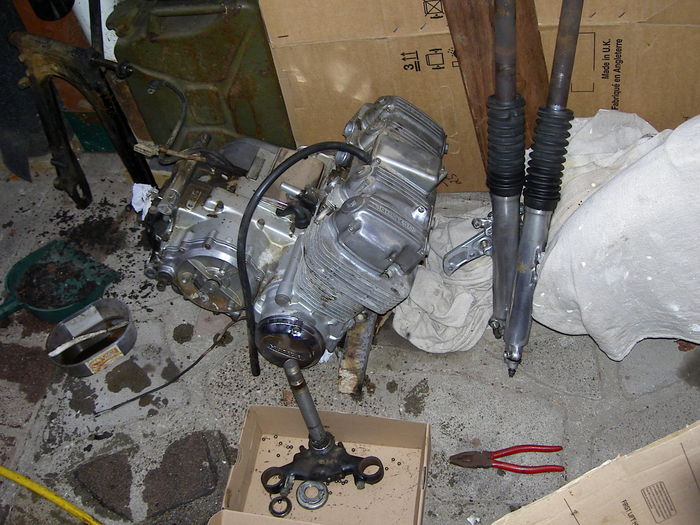
Engine out, i opted for the easy way lay the frame on its side and remove bolts and lift away from engine,
the engine is bit oily but it ran really sweet with no smoke, all the fins are in tact, but it leaks oil from the head quite badly, this will have a total strip paint and be fully reconditioned


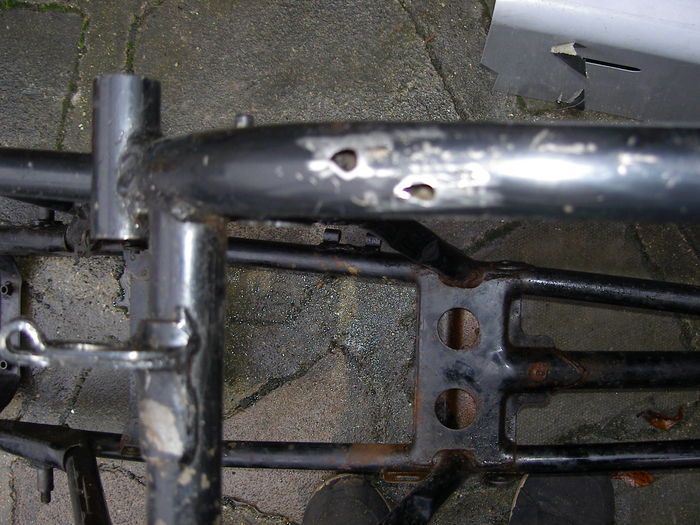
Frame had some  rust but mostly surface, just a couple of pin holes in lower tube, which i enlarged out till i was back into sound metal, then i welded them shut and ground it down and sanded smooth

« Last Edit: November 26, 2012, 07:10:56 am by UK Pete »


markb

  • Hero Member
  • *****
    • Posts: 1249
    • View Profile
Looks like a pretty nice job on the frame repair.
Mark B
1969 CB750 sandcast #97 restored - Sold Restoration thread link
1969 CB750 sandcaxt #576 - Sold
1969 CB750 sandcast #1553 - Sold
1969 CB750 sandcast #1990 - Sold
1969 CB750 sandcast #5383 restored - Sold Restoration thread link
1970 CB750 K0 restored - Sold
2010 H-D Tri Glide Ultra Classic (Huh?)


UK Pete

  • Sr. Member
  • ****
    • Posts: 337
    • View Profile
Thanks Mark, i have started reading back through your restoration posts and find it really interesting, i was looking to see if you had a K0 rebuild thread, as i read on the SOHC/4 site that you restored one
Pete


UK Pete

  • Sr. Member
  • ****
    • Posts: 337
    • View Profile
I was wondering how to get out my stubborn swing arm shock bushes, then i came up with the old socket trick and threaded bar, a bit of heat from a gas torch and wind up the nut they just pushed out,


 shame the steering head bearings wern't as  easy, turns out who ever put them in had done it with the bearing seat at an angle and so they were sort of friction welded in, i got them out eventually but will have to file the chived up metal back smooth again
« Last Edit: November 27, 2012, 03:35:37 am by UK Pete »


UK Pete

  • Sr. Member
  • ****
    • Posts: 337
    • View Profile
Thought i would do a bit of work on the front end, i am not sure what people do with their forks ie replace them cause they are rusty at the top, or just treat the rust and re use, i decided to reuse my fork stauntions as the chrome on the travel part of fork is perfect, the top part which honda left as exposed steel is not seen and the cost of replacing the tubes just because of unseen rust is not worth it as it would just add another £200+ pounds to the restoration cost for me to know that hidden behind the fork ears is shiney chrome
what i did was rub them down, treat with a chemical rust convertor, then a fine coat of silver paint


I stripped the top yolk of its paint and gave it a couple of coats of satin black, the finish is almost spot on to the original, i know as i have a NOS one to compare to


While i was in the mood i removed the steering lock and bearing  stripped and re-painted the lower clamp, but used gloss black as that is what was used originally


« Last Edit: November 28, 2012, 01:33:25 pm by UK Pete »


UK Pete

  • Sr. Member
  • ****
    • Posts: 337
    • View Profile
My tank was looking very tatty and i was unsure to its condition beolow all the horrible black paint, so i just had to strip the paint off to access the state of the metal, to my surprise it is in fantastic condition there is only one dent and virtually no rust inside and out , plus the added bonus that it is the original correct tank for the year , just look at those lovely wrinkles and the original cap

Getting the mucky old paint off, the original colour was candy ruby red


Lovelly deep ridge wrinkles


No rust inside


Starting to reveal the beutifully preserved metal on this 43 year old tank


I am so pleased with this , i spent a lot of money buying this bike but having most of the original parts is sometimes priceless


Only one dent, does anyone have any suggestions on how to get this dent out?


Prospect

  • Jr. Member
  • **
    • Posts: 65
    • View Profile
I was wondering how to get out my stubborn swing arm shock bushes, then i came up with the old socket trick and threaded bar, a bit of heat from a gas torch and wind up the nut they just pushed out,


 shame the steering head bearings wern't as  easy, turns out who ever put them in had done it with the bearing seat at an angle and so they were sort of friction welded in, i got them out eventually but will have to file the chived up metal back smooth again

Nice tip. I've always had trouble with that. What size sockets are you using?
Vin 256/106


UK Pete

  • Sr. Member
  • ****
    • Posts: 337
    • View Profile
Not sure what the socket size was  i just went through them till i found the appropriate sizes
Made some more progress today, i was thinking of a plan of attack which way best to tackle the restoration when it occured to me that my preffered method of installing the engine is to lay it on its side and lower the frame over it, so i really need to build the engine sooner rather than later as i wont be putting anything back together until the engine is in the frame, so i set about getting a decent size bench for engine building, the perfect place is in the warm and dry so in my nice heate garage it is, on top of my pool table, which happens to be where i built my F2 engine

The problem as always is man handling the engine, you have to so carefull lifting these as its quite easy to bust your bollocks and back, so below is how i tackled it

First of all create the space


Get the engine out and onto a scate board


Up into the garage and on to a lower work bench


And onto the build bench


Its first time i have had a good look at the engine, the main thing is no bad cosmetic damage , all the fins are in great condition, also the lower half of the engine looks like its never been disasembled before which is always a plus point i find, another good point is that the engine ran really well it just leaked oil so  i am hoping for no nasty surpises


UK Pete

  • Sr. Member
  • ****
    • Posts: 337
    • View Profile
Here goes then time to strip the engine

Rocker cover off,a well preserved number written on inside


 all looks good in there


Cam towers off they both have a code on the side, could it be a date ?


I have had one of these snap before so i am not taking any chances as this one is in real tight, a bit of heat and a hit from the hammer free,s it up


Off with the head,it has had a serious oil leak for some time by the looks of it


Off with the barrels


Open up the crankcase, all looks good, vitually no sludge, just a few bit of muck in the oil strainer


Washed the cases in my parts washer, more preserved numbers written inside


Could this be the bearing code on the underside of front upper crankcase


At last some sort of order, all small bits baged and labled, cases cylinders and head all washed clean , now i can work my way through this lot and see what i need to order


« Last Edit: November 30, 2012, 04:06:41 am by UK Pete »


markb

  • Hero Member
  • *****
    • Posts: 1249
    • View Profile
Could this be the bearing code on the underside of front upper crankcase

That is what they are.
Mark B
1969 CB750 sandcast #97 restored - Sold Restoration thread link
1969 CB750 sandcaxt #576 - Sold
1969 CB750 sandcast #1553 - Sold
1969 CB750 sandcast #1990 - Sold
1969 CB750 sandcast #5383 restored - Sold Restoration thread link
1970 CB750 K0 restored - Sold
2010 H-D Tri Glide Ultra Classic (Huh?)


UK Pete

  • Sr. Member
  • ****
    • Posts: 337
    • View Profile
Done my battery box and electrics this weekend, a bit random i know, one minute i am doing the tank then engine, the next i am doing this but i suppose it pays to do anything  as it is all a step nearer to the end

Here is a reminder of the battery box and electrics


Zinc plating some of the bolts and brakets


Lots of other bit done , bring it all together and it looks real good i think,


« Last Edit: December 03, 2012, 03:56:50 pm by UK Pete »


UK Pete

  • Sr. Member
  • ****
    • Posts: 337
    • View Profile
This thread has had 275 visits, i am taking lots of time and trouble to bring this restoration thread to you guys, yet only one person has made any comments on here (Thanks MarkB), YOU GUYS SURE DO KNOW HOW TO MAKE A NEW GUY UNWELCOME ON THIS SITE
I am not sure if it worth doing any more posts here, i though it would be interesting for people to see how much a non sandcast 69 bike had in common with a sanmdcast engined 69 bike, i suppose i should stay a lurker like many and just read the odd posts that crop up from time to time
It is a great site full of info which i was trying to add to but sadly enough is enough , i will carry on with this thread but probably on another site
Pete


Bickle

  • Guest
This thread has had 275 visits, i am taking lots of time and trouble to bring this restoration thread to you guys, yet only one person has made any comments on here (Thanks MarkB), YOU GUYS SURE DO KNOW HOW TO MAKE A NEW GUY UNWELCOME ON THIS SITE
I am not sure if it worth doing any more posts here, i though it would be interesting for people to see how much a non sandcast 69 bike had in common with a sanmdcast engined 69 bike, i suppose i should stay a lurker like many and just read the odd posts that crop up from time to time
It is a great site full of info which i was trying to add to but sadly enough is enough , i will carry on with this thread but probably on another site
Pete

+1
I have learned to keep my mouth shut on this site (ooops sorry)  So much so that I sold all my sandcasts and just pop in here once in awhile as I still have my diecast. (Great build thread by you by the way) See your build on SOHC4 I guess.
« Last Edit: November 26, 2012, 03:20:12 am by Bickle »


Wayne

  • Administrator
  • Hero Member
  • *****
    • Posts: 1044
    • View Profile
Pete
With so few members there is often little or no participation for long periods, then something really interesting pops up and wham!...We have some chatter. I have learned it's just the nature of the beast. I don't get bent out of shape when folks don't respond to a post. I'm doing my restoration thread as a way to document the tear down and reassembly of 576. If people want to comment great! Perhaps these stats will paint a better picture for you:

http://cb750sandcastonly.com/smf_forum/index.php?action=stats

I'm not quite sure what Bickle meant when he said he learned to keep his mouth shut here? I came in a newbie like most others and was treated very well right off the hop.  :)
« Last Edit: November 26, 2012, 09:26:46 am by Wayne »
[size=